dataLayer & Google Tag Manager with Shopify Checkout Extensibility
Shopify's new checkout with its JavaScript sandbox requires these adjustments to implement the Google Tag Manager and dataLayer.

Justus
owntag Founder
published July 30, 2024
Starting from August 13, 2024, it will no longer be possible to edit the HTML & JavaScript code of Shopify’s checkout. Previously, this was done through modifications in the checkout.liquid file.
With the completely revamped checkout (“Checkout Extensibility”), this is no longer possible.
For Shopify, it’s a logical step to enforce more technical control within the checkout, but it poses a real challenge for implementing tracking code.
Sandbox
The only way to implement your own code in the checkout now is through “Web Pixels”.
These code snippets are implemented as a sandbox.
This means that the code is executed in a separate environment with intentionally limited access to some browser functions. Within Web Pixels, there’s a further distinction between App Pixels, created by Shopify Apps, and Custom Web Pixels, which are manually created by the shop owner.
Custom Web Pixels
App Pixels are even more restricted and do not, for example, have access to the window object in the browser, which is essential for many tracking scripts, including Tag Manager.
As a result, Shopify Apps do not have a direct way to integrate Google Tag Manager and dataLayer events. Some apps claim to do this but can only manage it for pages outside the checkout, referring to the solution described below for the checkout itself.
For all events triggered in the checkout, the only viable solution is to create a Custom Web Pixel manually:
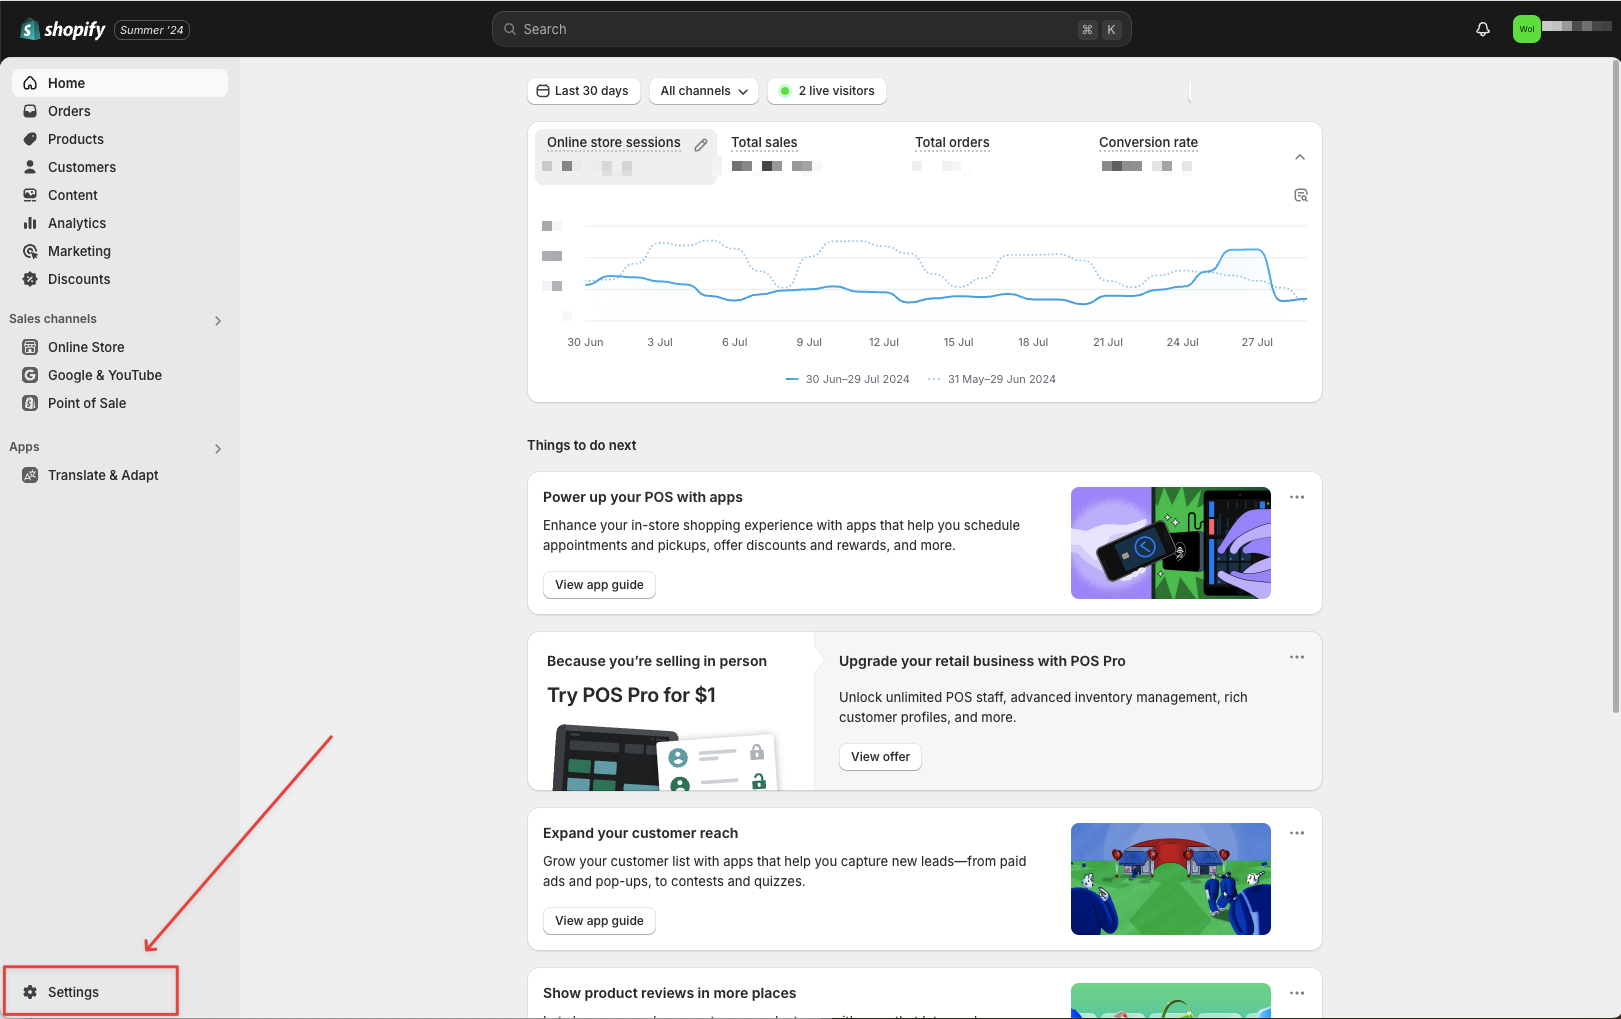
- “Customer Events” can be found in Shopify settings under “Settings” > “Customer events”
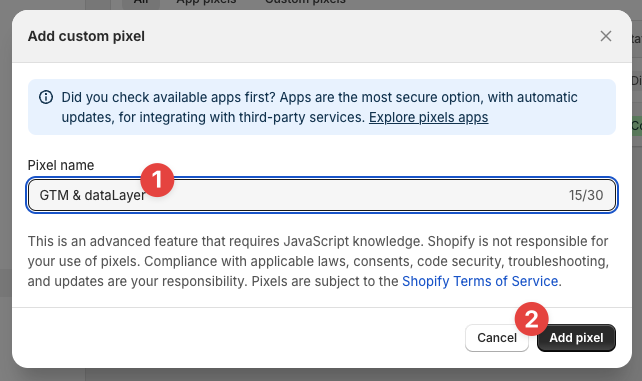
- Click on “Add custom pixel”
- Then, give it a unique name, like “GTM & dataLayer”
The consent settings here refer to Shopify’s own consent management. If you are using it, select the setting that aligns with what you want to implement in GTM.
If you’re using a third-party consent management tool like Cookiebot or Usercentrics, you can set the options here to “Not required” and “Data collection does not qualify as data sale,” and handle the necessary consents within your consent management tool.
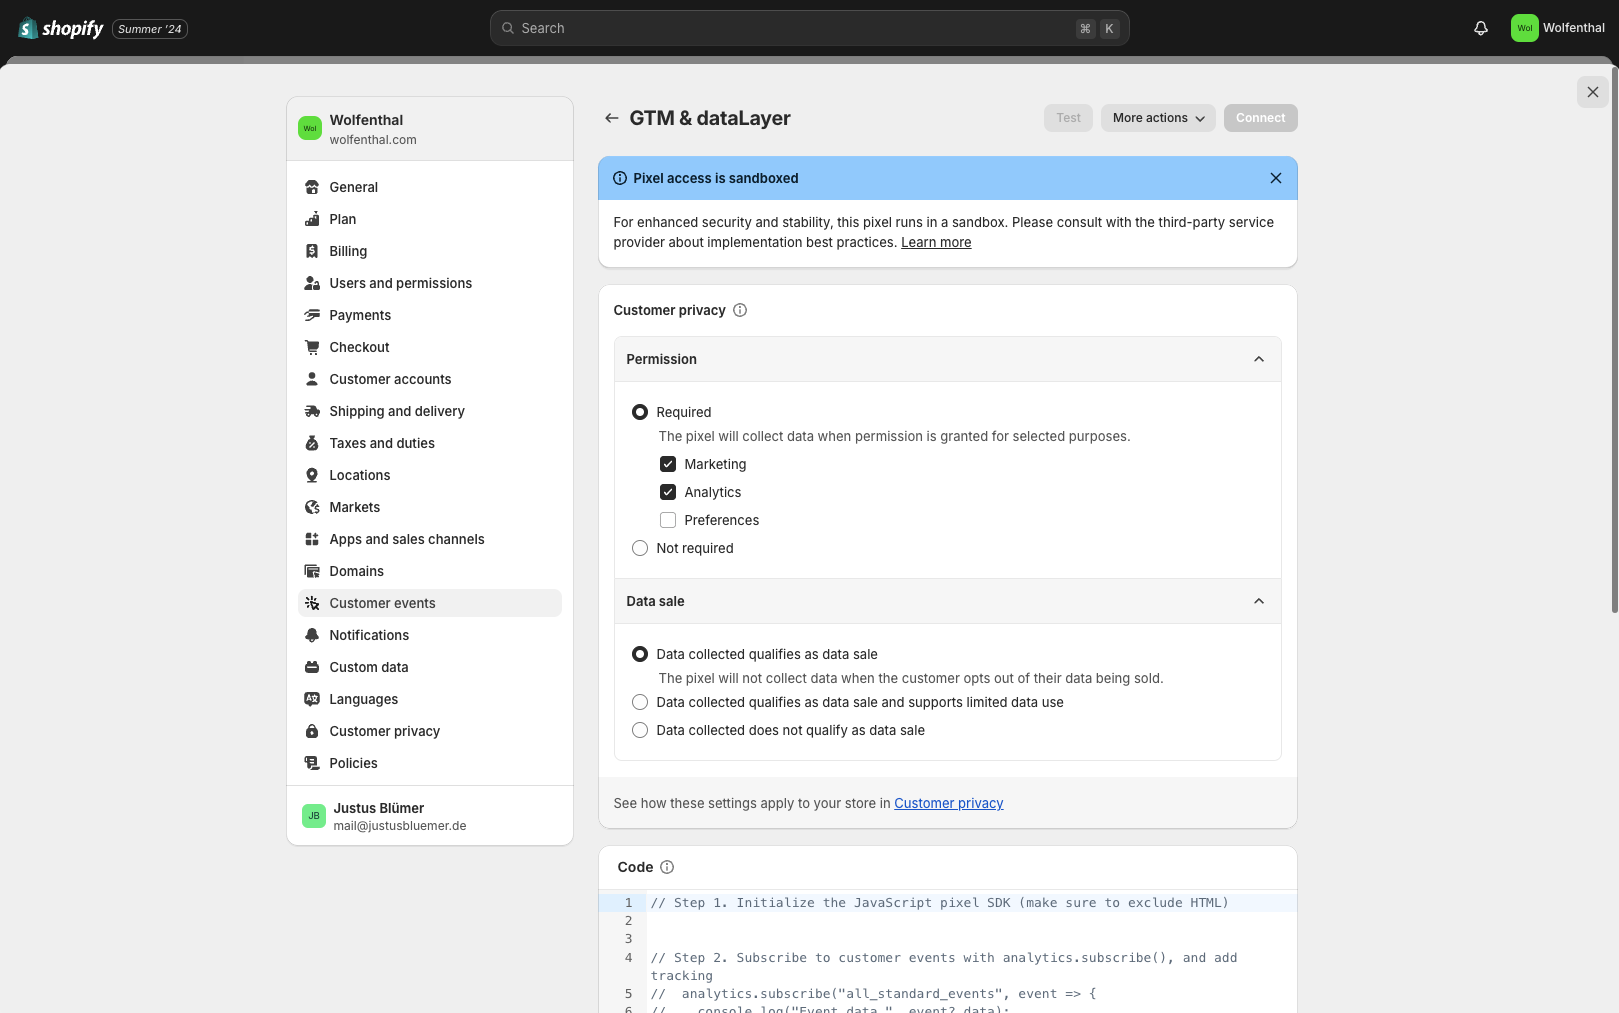
- Now to the crucial part: The code that both loads the Google Tag Manager and implements the dataLayer.
It ensures that these dataLayer events are triggered:
init- Always triggered first and contains basic shop information, such as the shop’s country settingspage_view- Page viewview_item- Product detail page viewadd_to_cart- Adding a product to the cartbegin_checkout- Entering the checkoutadd_payment_info- Adding payment informationpurchase- Completing a purchase
The init event is just the vehicle to pass basic shop information to the dataLayer, which will then be available for subsequent events.
Also included are hashed user data in the user_data object, at least if the user is logged in.
// Google Tag Manager (GTM) & dataLayer integration for Shopify Checkout Extensibility
// provided by owntag.eu

// Configuration
const gtmContainerId = "GTM-XXXXXXX";
const gtmContainerUrl = "https://www.googletagmanager.com/gtm.js";

(function (w, d, s, l, i) {
	w[l] = w[l] || [];
	w[l].push({ "gtm.start": new Date().getTime(), event: "gtm.js" });
	var f = d.getElementsByTagName(s)[0],
		j = d.createElement(s),
		dl = l != "dataLayer" ? "&l=" + l : "";
	j.async = true;
	j.src = gtmContainerUrl + "?id=" + i + dl;
	f.parentNode.insertBefore(j, f);
})(window, document, "script", "dataLayer", gtmContainerId);

const pushToDataLayer = (eventName, eventData) => {
	window.dataLayer = window.dataLayer || [];
	window.dataLayer.push({
		event: eventName,
		...eventData,
	});
};

async function sha256(message) {
	const msgBuffer = new TextEncoder().encode(message);
	const hashBuffer = await crypto.subtle.digest("SHA-256", msgBuffer);
	const hashArray = Array.from(new Uint8Array(hashBuffer));
	const hashHex = hashArray
		.map((b) => b.toString(16).padStart(2, "0"))
		.join("");
	return hashHex;
}

const createItemData = (productVariant) => {
	return {
		item_id: productVariant.sku,
		item_name: productVariant.product.title,
		item_variant: productVariant.title,
		currency: productVariant.price.currencyCode,
		item_brand: productVariant.product.vendor,
		price: productVariant.price.amount,
	};
};

const createLineItemsData = (lineItems) => {
	return lineItems.map((item) => {
		return {
			item_id: item.variant.sku,
			item_name: item.title,
			...(item.variant?.title && { item_variant: item.variant.title }),
			currency: item.variant.price.currencyCode,
			item_brand: item.variant.product.vendor,
			price: item.variant.price.amount,
			quantity: item.quantity,
		};
	});
};

function ga4CheckoutEvents(event) {
	const { checkout } = event.data;
	const lineItems = createLineItemsData(checkout.lineItems);

	const shipping = checkout.shippingLine?.price.amount || 0;
	const tax = checkout.totalTax?.amount || 0;
	const totalNetPrice = checkout.subtotalPrice.amount;
	const totalGrossPrice = checkout.totalPrice.amount;

	return {
		ecommerce: {
			currency: checkout.totalPrice.currencyCode,
			value: totalGrossPrice - tax,
			value_incl_tax_incl_shipping: checkout.totalPrice.amount,
			value_incl_tax_excl_shipping: totalNetPrice,
			items: lineItems,
		},
		_clear: true,
	};
}

async function pushInitEventToDataLayer(event) {
	const checkout = event.data?.checkout;
	const customer = init?.data?.customer;

	const userData = {};

	// Customer is logged in
	if (customer && customer.id) {
		(userData.sha256_email_address = customer.email ? await sha256(customer.email) : null),
			(userData.address = {
				sha256_first_name: customer.firstName ? await sha256(customer.firstName) : null,
				sha256_last_name: customer.lastName ? await sha256(customer.lastName) : null,
			});
		if (customer.phone) {
			userData.sha256_phone_number = await sha256(customer.phone);
		}
		// Customer is not logged in
	} else {
		if (checkout && checkout.email) {
			userData.sha256_email_address = await sha256(checkout.email);
		}
		if (checkout && checkout.phone) {
			userData.sha256_phone_number = await sha256(checkout.phone);
		}
	}

	pushToDataLayer("init", {
		...(event.data?.checkout?.localization?.country?.isoCode && {
			country: event.data.checkout.localization.country.isoCode,
		}),
		...(event.data?.checkout?.localization?.language?.isoCode && {
			language:
				event.data.checkout.localization.language.isoCode.split("-")[0],
		}),
		page_type: "checkout",
		user_data: userData,
		user_id: init.data.customer?.id,
	});
}

async function page_view(event) {
	await pushInitEventToDataLayer(event);

	pushToDataLayer("page_view", {
		page_location: event.context.window.location.href,
		page_title: event.context.document.title,
	});
}

async function view_item(event) {
	await pushInitEventToDataLayer(event);

	const { productVariant } = event.data;
	const itemData = {
		item_id: productVariant.sku,
		item_name: productVariant.product.title,
		item_variant: productVariant.title,
		currency: productVariant.price.currencyCode,
		item_brand: productVariant.product.vendor,
		price: productVariant.price.amount,
	};

	pushToDataLayer("view_item", {
		ecommerce: {
			currency: productVariant.price.currencyCode,
			value: productVariant.price.amount,
			items: [itemData],
		},
		_clear: true,
	});
}

async function add_to_cart(event) {
	await pushInitEventToDataLayer(event);

	const { cartLine } = event.data;
	const subtotalPrice = cartLine.cost.totalAmount.amount;
	const itemData = {
		item_id: cartLine.merchandise.sku,
		item_name: cartLine.merchandise.product.title,
		...(cartLine.merchandise?.title && {
			item_variant: cartLine.merchandise.title,
		}),
		currency: cartLine.merchandise.price.currencyCode,
		...(cartLine.merchandise.product?.vendor && {
			item_brand: cartLine.merchandise.product.vendor,
		}),
		price: Number(parseFloat(cartLine.merchandise.price.amount).toFixed(2)),
		quantity: parseInt(cartLine.quantity, 10),
	};

	pushToDataLayer("add_to_cart", {
		ecommerce: {
			currency: cartLine.merchandise.price.currencyCode,
			value: Number(subtotalPrice),
			items: [itemData],
		},
		_clear: true,
	});
}

async function add_payment_info(event) {
	await pushInitEventToDataLayer(event);
	const checkoutData = ga4CheckoutEvents(event);
	pushToDataLayer("add_payment_info", checkoutData);
}

async function begin_checkout(event) {
	await pushInitEventToDataLayer(event);
	const checkoutData = ga4CheckoutEvents(event);
	pushToDataLayer("begin_checkout", checkoutData);
}

async function purchase(event) {
	await pushInitEventToDataLayer(event);
	const checkoutData = ga4CheckoutEvents(event);
	const { checkout } = event.data;

	checkoutData.ecommerce.transaction_id =
		checkout.order?.id || checkout.token;
	checkoutData.ecommerce.shipping =
		checkout.shippingLine?.price.amount ||
		checkout.shipping_line?.price.amount ||
		0;
	checkoutData.ecommerce.tax = checkout.totalTax?.amount || 0;
	checkoutData.ecommerce.discount = checkout.discountsAmount?.amount || 0;

	pushToDataLayer("purchase", checkoutData);
}

if (analytics) {
	analytics.subscribe("page_viewed", page_view);
	analytics.subscribe("product_viewed", view_item);
	analytics.subscribe("product_added_to_cart", add_to_cart);
	analytics.subscribe("checkout_started", begin_checkout);
	analytics.subscribe("payment_info_submitted", add_payment_info);
	analytics.subscribe("checkout_completed", purchase);
}
To ensure that your GTM is loaded, you need to replace the placeholder with your container ID (GTM-...) in line 5.
You can optionally adjust the gtmContainerUrl if you’re already using Server-Side Tagging or the Google First Party Mode and want to load your GTM Web Container script from your own URL instead of Google’s servers.
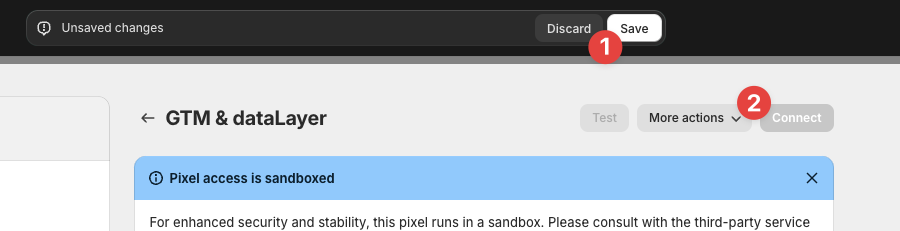
After inserting the code, you need to save the changes and then activate the pixel by clicking the “Connect” button:
Testing the dataLayer Events
Due to the sandbox environment with its limited functionality, the practical Preview Mode of Google Tag Manager does not work – unfortunately, there’s no way around this.
The only way to see which tags were triggered is by monitoring outgoing HTTP requests.
One way to at least view the dataLayer events triggered in the checkout is through the browser’s JavaScript console.
Where it usually says “top”, which is the top level of the browser window, you can select another frame with a name that follows the pattern web-pixel-sandbox-CUSTOM-…-LAX:

If you have other Custom Web Pixels set up besides the GTM/dataLayer pixel, you may need to try several until you find the correct one.
The correct one is the one where dataLayer is defined, and you’ll see a similar output as shown here when you type dataLayer into the JS console and press Enter:

Testing the outgoing Requests
If you have set up tags in Google Tag Manager that successfully trigger dataLayer events and send data to external services like GA4, you can see these HTTP requests as usual in the browser’s Developer Console.
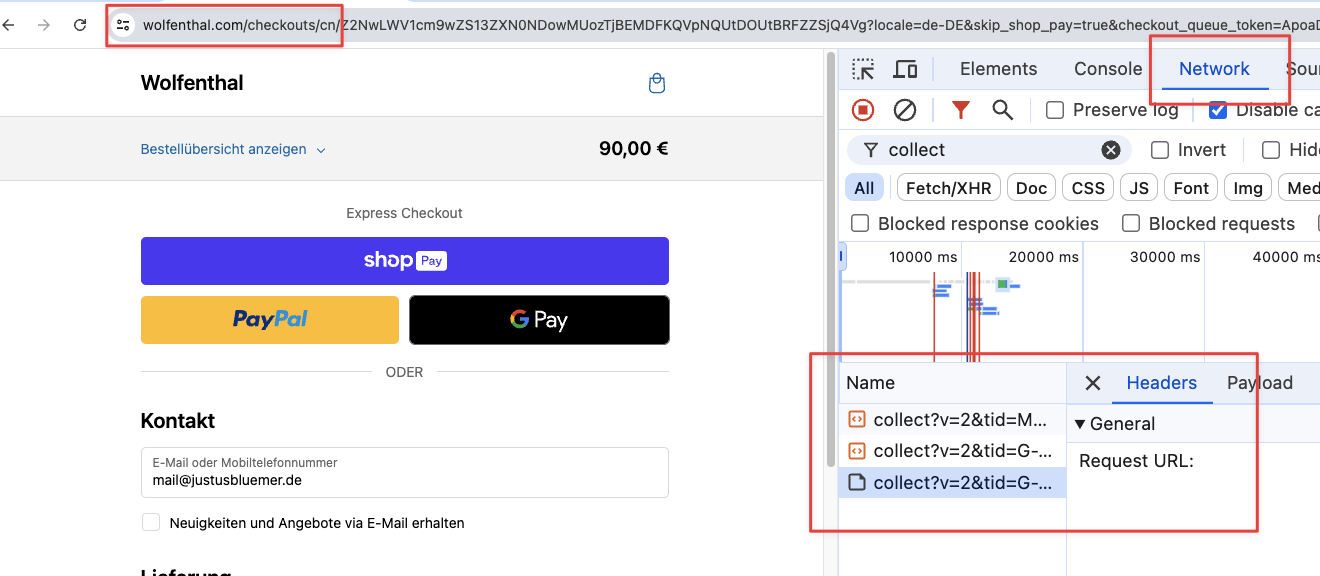
But be careful: If Shopify reliably recognizes the user and the in-house “Shop Pay” payment method is enabled, you may be redirected directly to the “shop.app” domain. This may look like a checkout, but it is not. In this case, you need to first click “Check out as guest” at the bottom of the page.

Update history
- 2024-07-30: Initial version
- 2025-02-04: Updated to contain
ecommerce.discountproperty
Become a Server Side Tagging Pro with owntag
Take control of your digital data collection with Server Side Tagging and Server Side GTM – easily hosted with owntag.