How to Make Your Server-Side GTM Accessible for Free via Cloudflare on Your Main Domain and Bypass ITP
Cookie lifetimes in Safari / WebKit are limited to 24 hours for cookies from external servers. We'll show you how to bypass these restrictions using Cloudflare Workers and Server Side GTM.

Justus
owntag Founder
published March 19, 2025
The tracking restrictions imposed by WebKit, the browser engine behind Safari, make reliable tracking challenging, particularly by significantly limiting the lifespan of cookies, sometimes to just 24 hours.
This makes it impossible to reliably measure longer customer journeys, meaning a user’s traffic source cannot be correlated with their later conversion. Ultimately, it becomes difficult to decide which channels are worth investing in.
Setting cookies via HTTP headers, as enabled by server-side GTM, only works under specific conditions: the HTTP request setting the cookie must originate from the same IP address as the first request that delivers the website’s HTML code.
More precisely, it suffices if the two IP addresses match halfway.
Expensive: Cloudflare Enterprise
If your company has a (costly) Cloudflare Enterprise account, you can implement a solution using Origin Rules without relying on Workers.
Google provides a guide that, while focusing on the “First Party Mode” rather than server-side GTM, might still be an excellent source of inspiration.
Free: Cloudflare Workers
Cloudflare Workers are small “serverless” functions written in JavaScript that run on Cloudflare’s platform whenever a user accesses a URL matching a pattern you define.
100,000 worker executions—and therefore HTTP requests to the SGTM—are included per day (!) in the free plan, which is often sufficient for small to medium-sized websites.
Step-by-Step Guide
I assume your website already uses Cloudflare as a CDN. I do not recommend setting up Cloudflare solely to circumvent tracking restrictions. Using a CDN affects all parts and functionalities of the website and should therefore only be done in coordination with all company stakeholders.
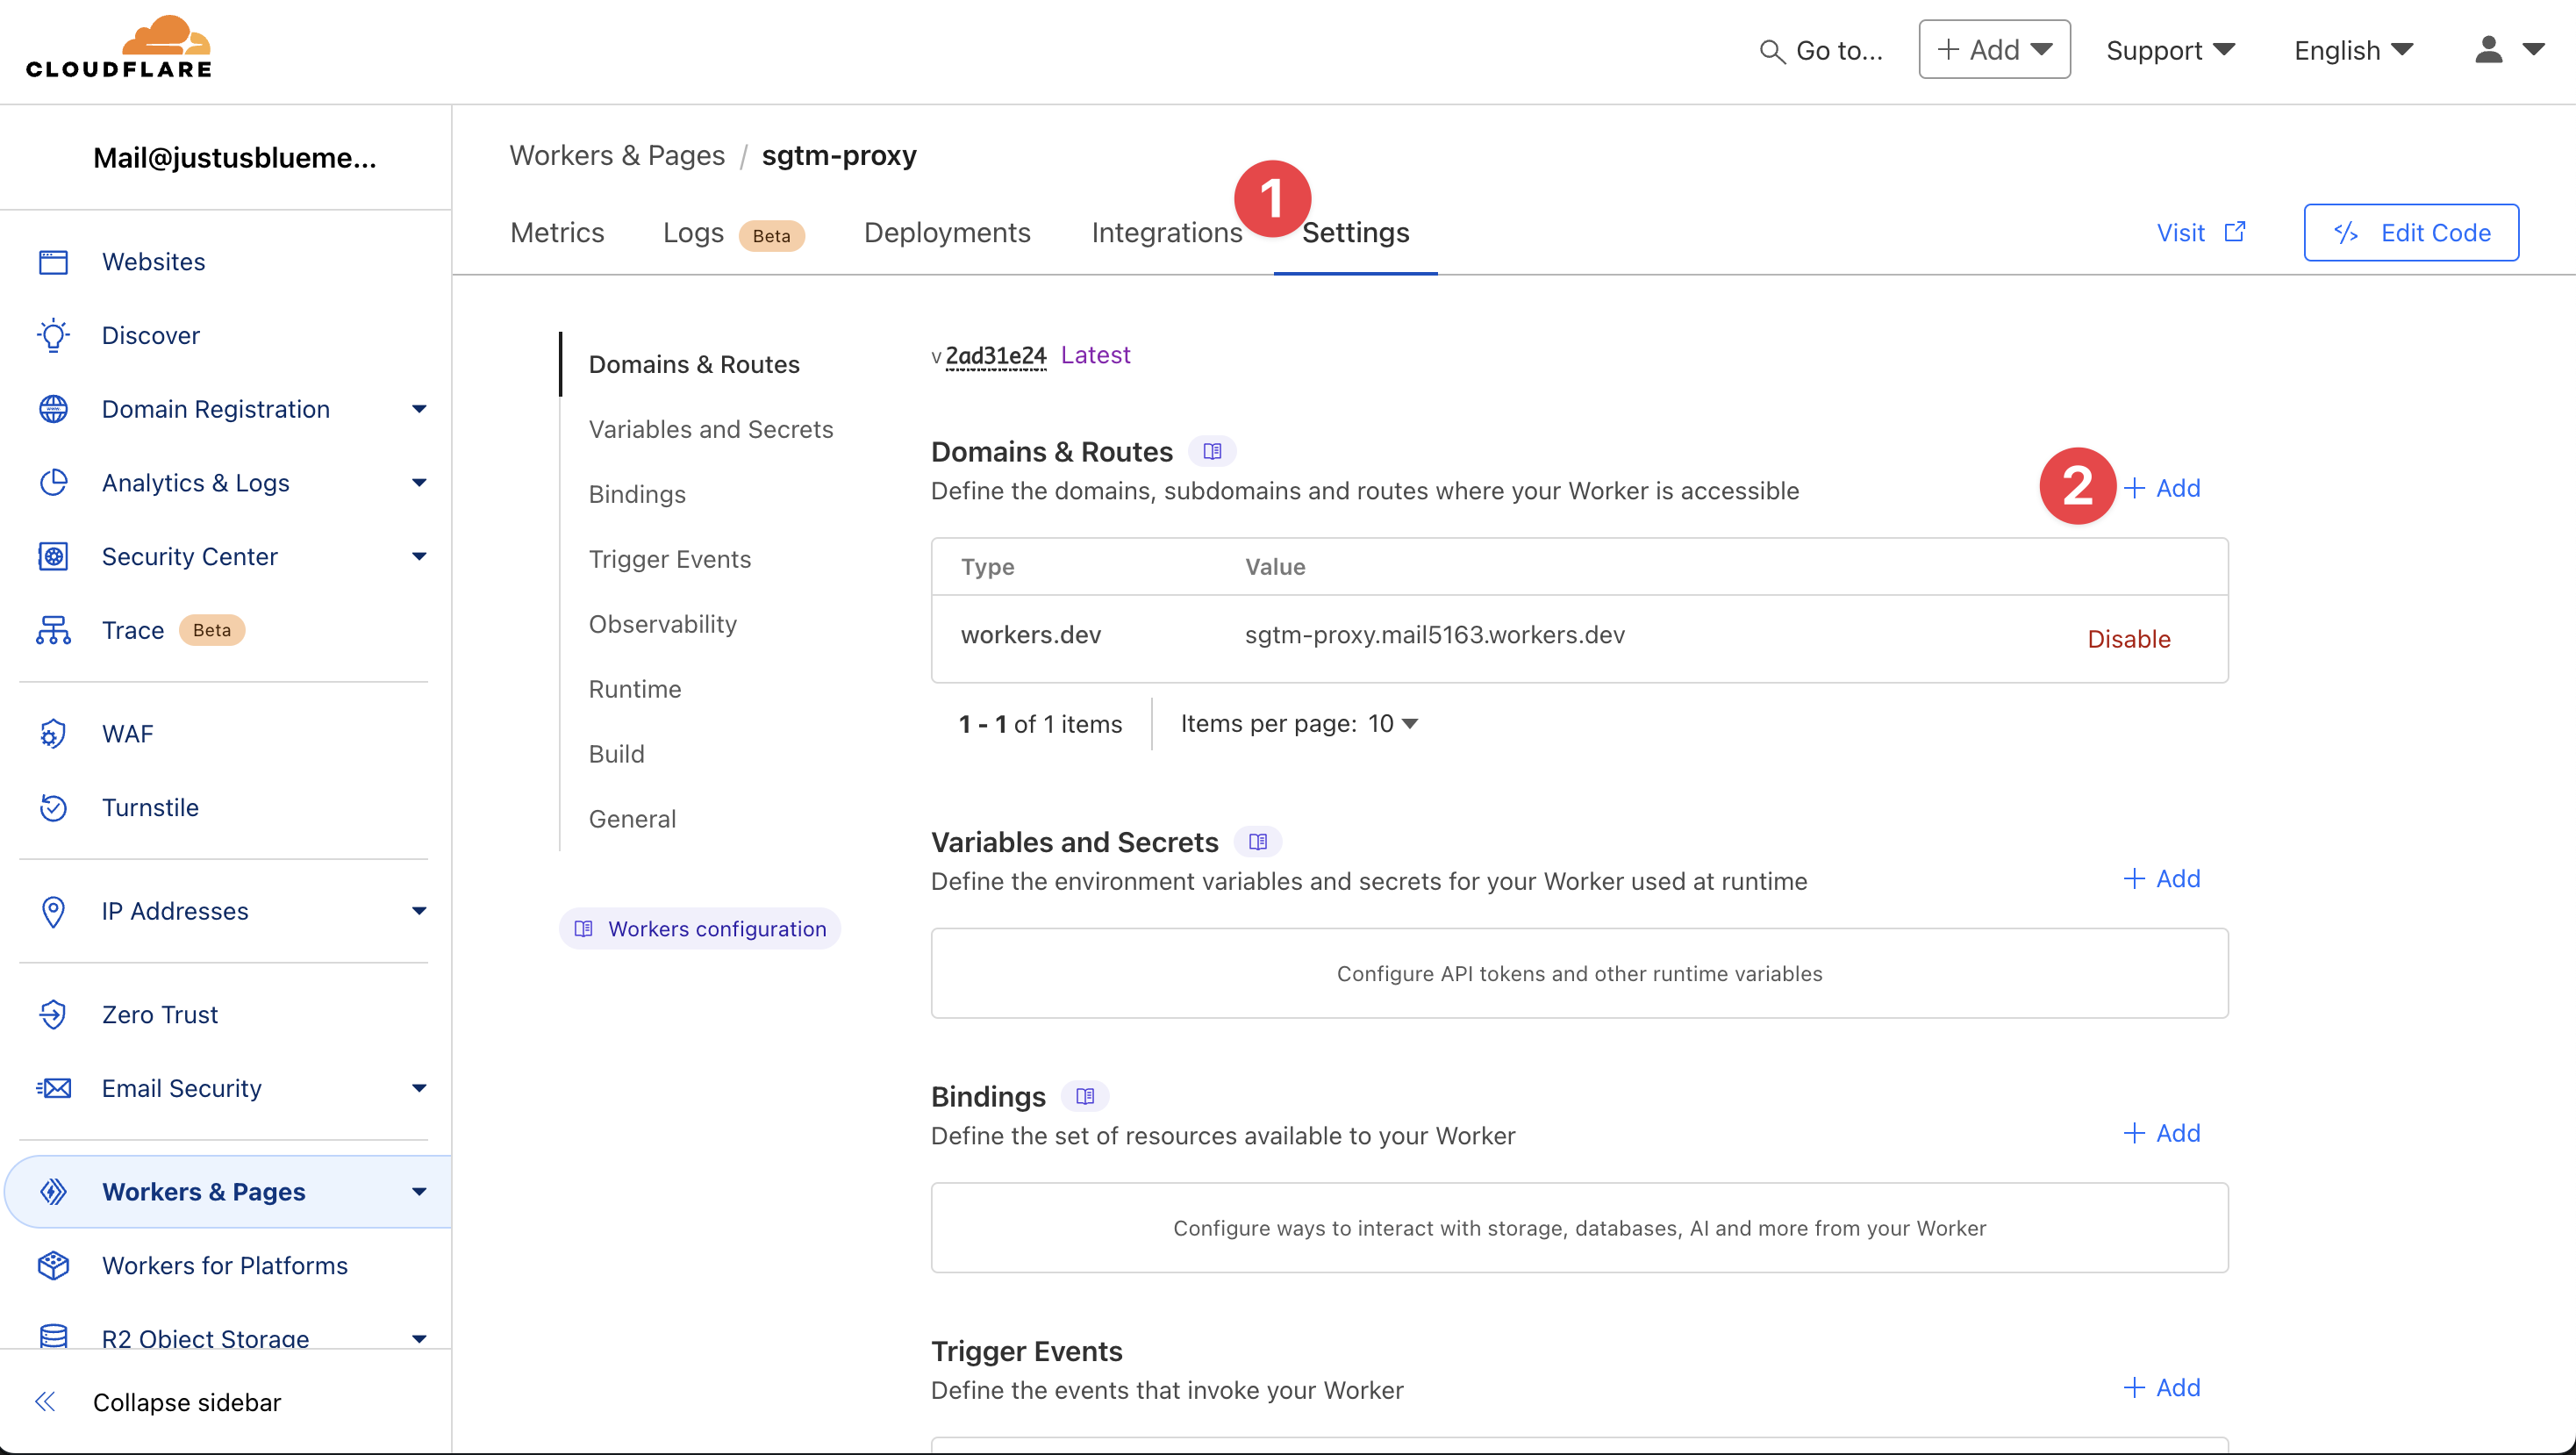
- Create a new Worker:
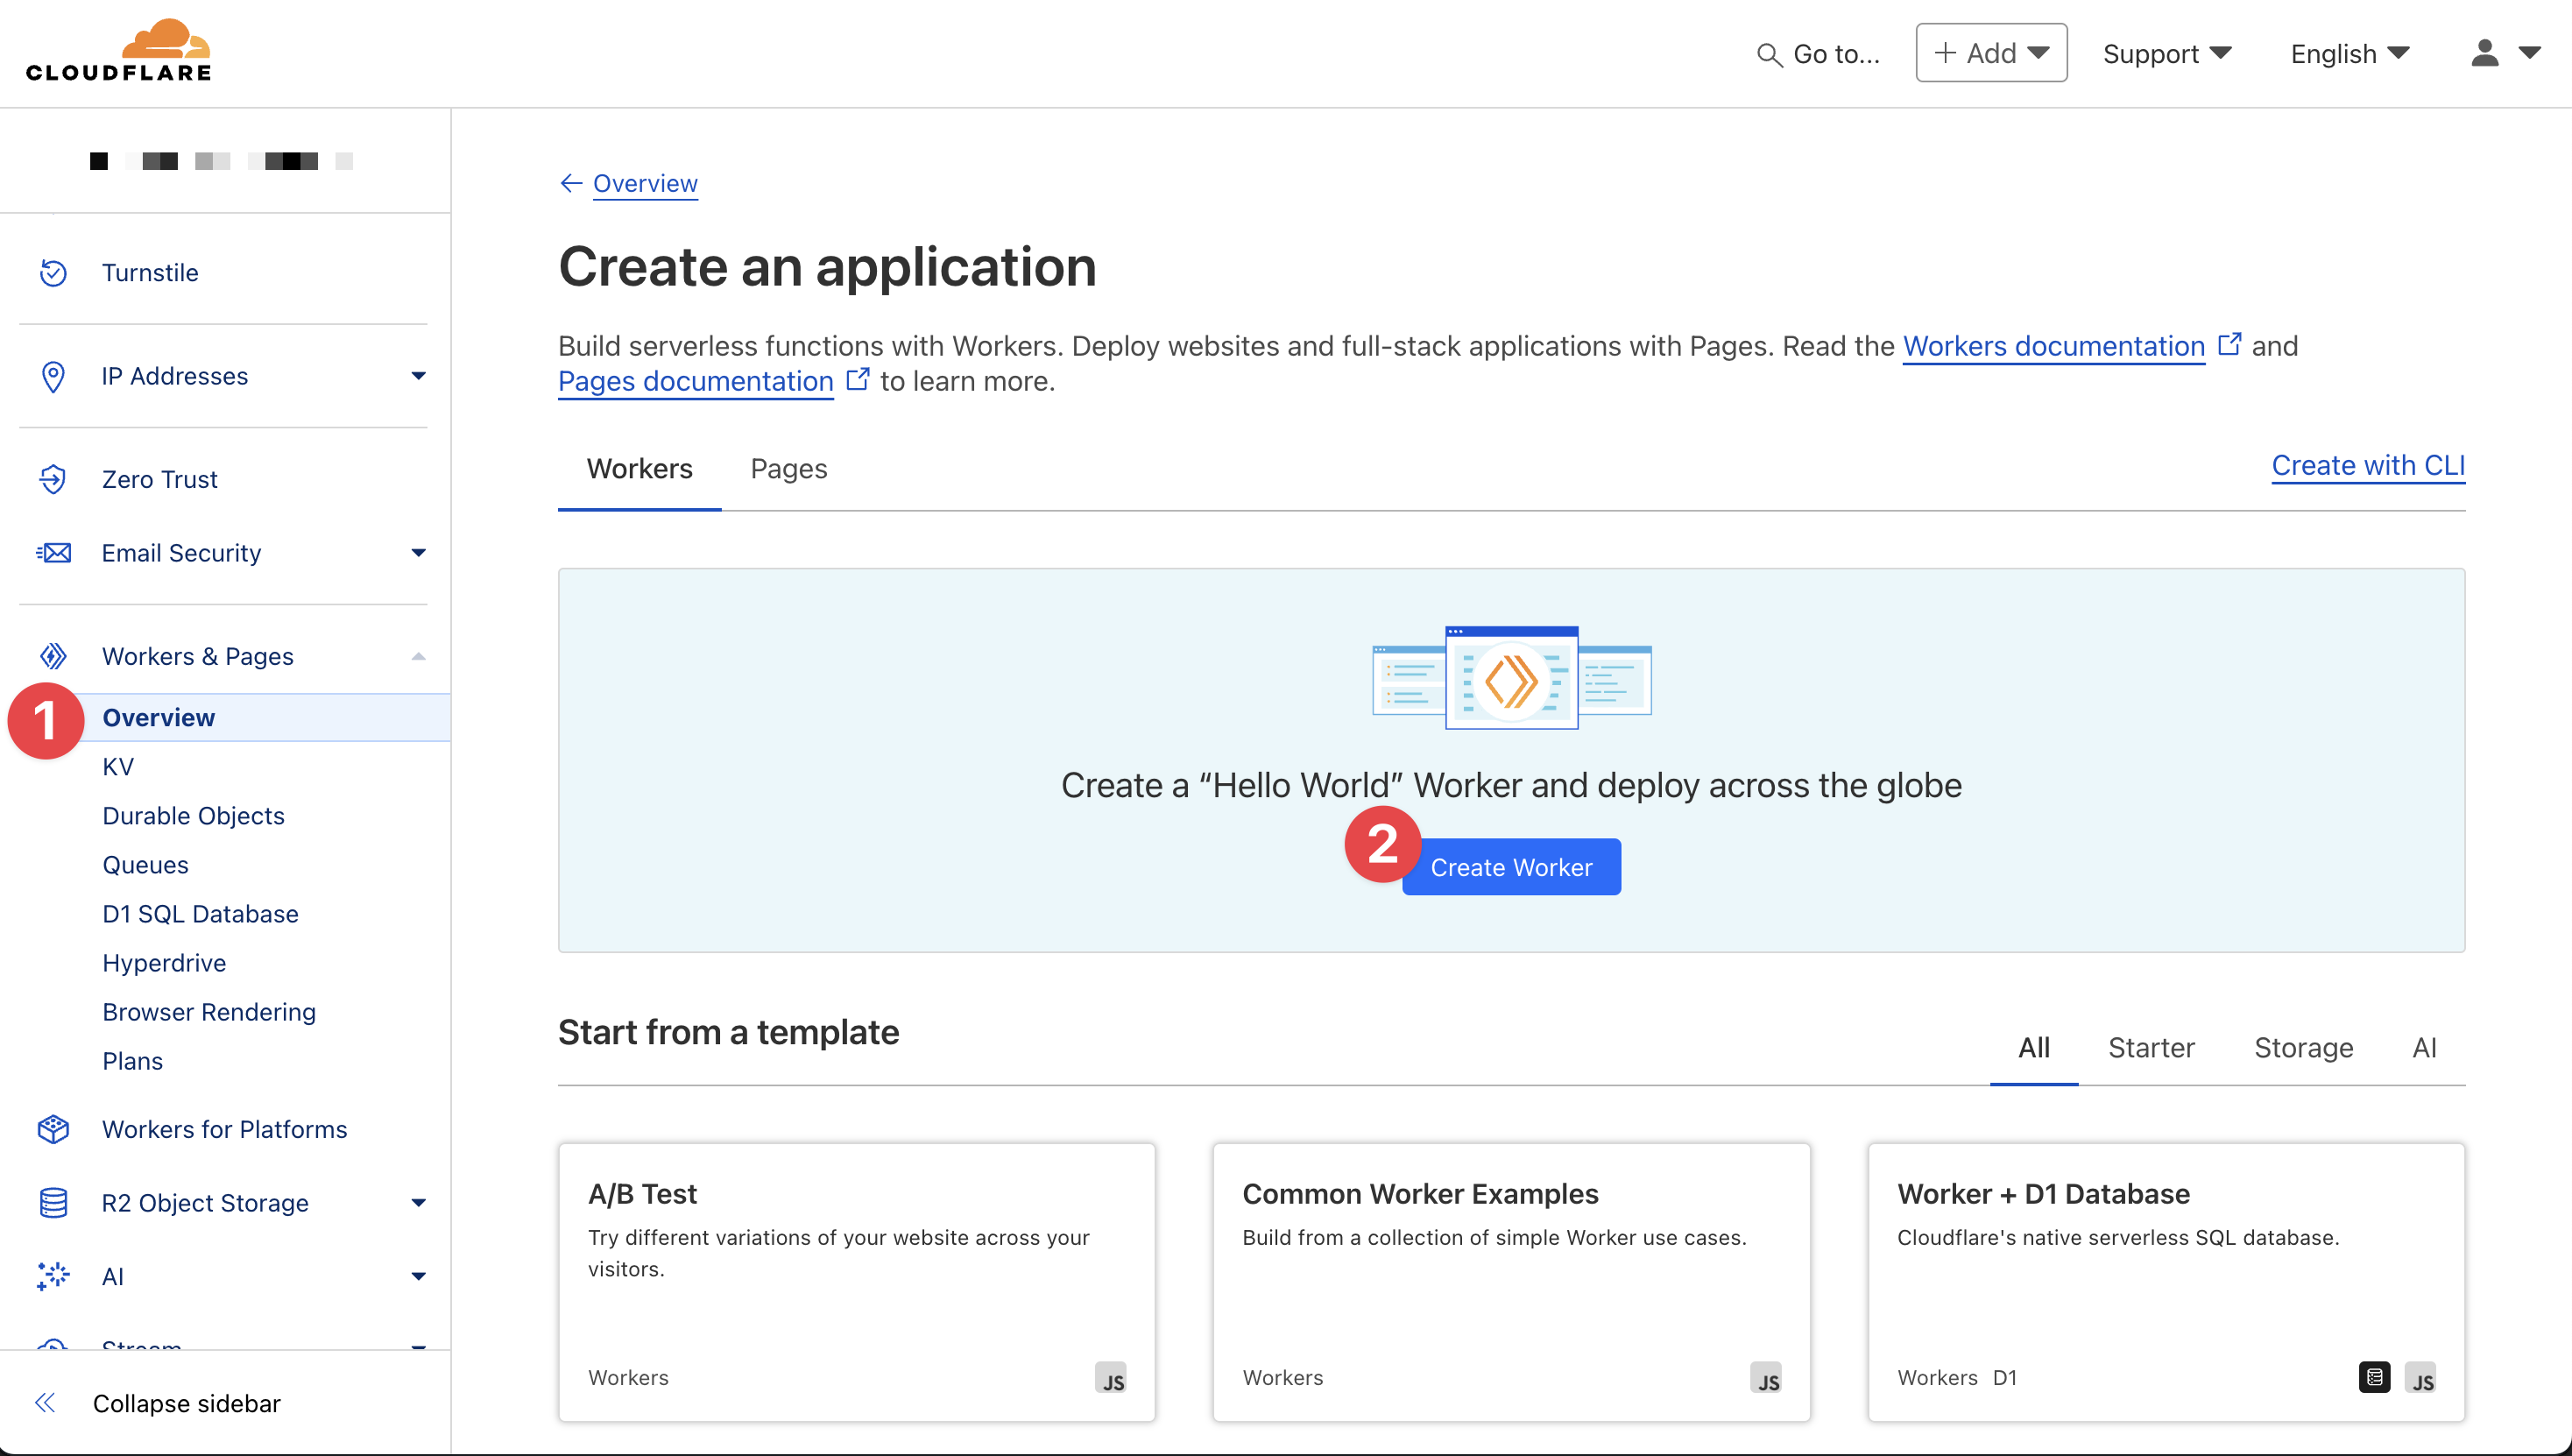
Name your worker as you like; I chose sgtm-proxy.
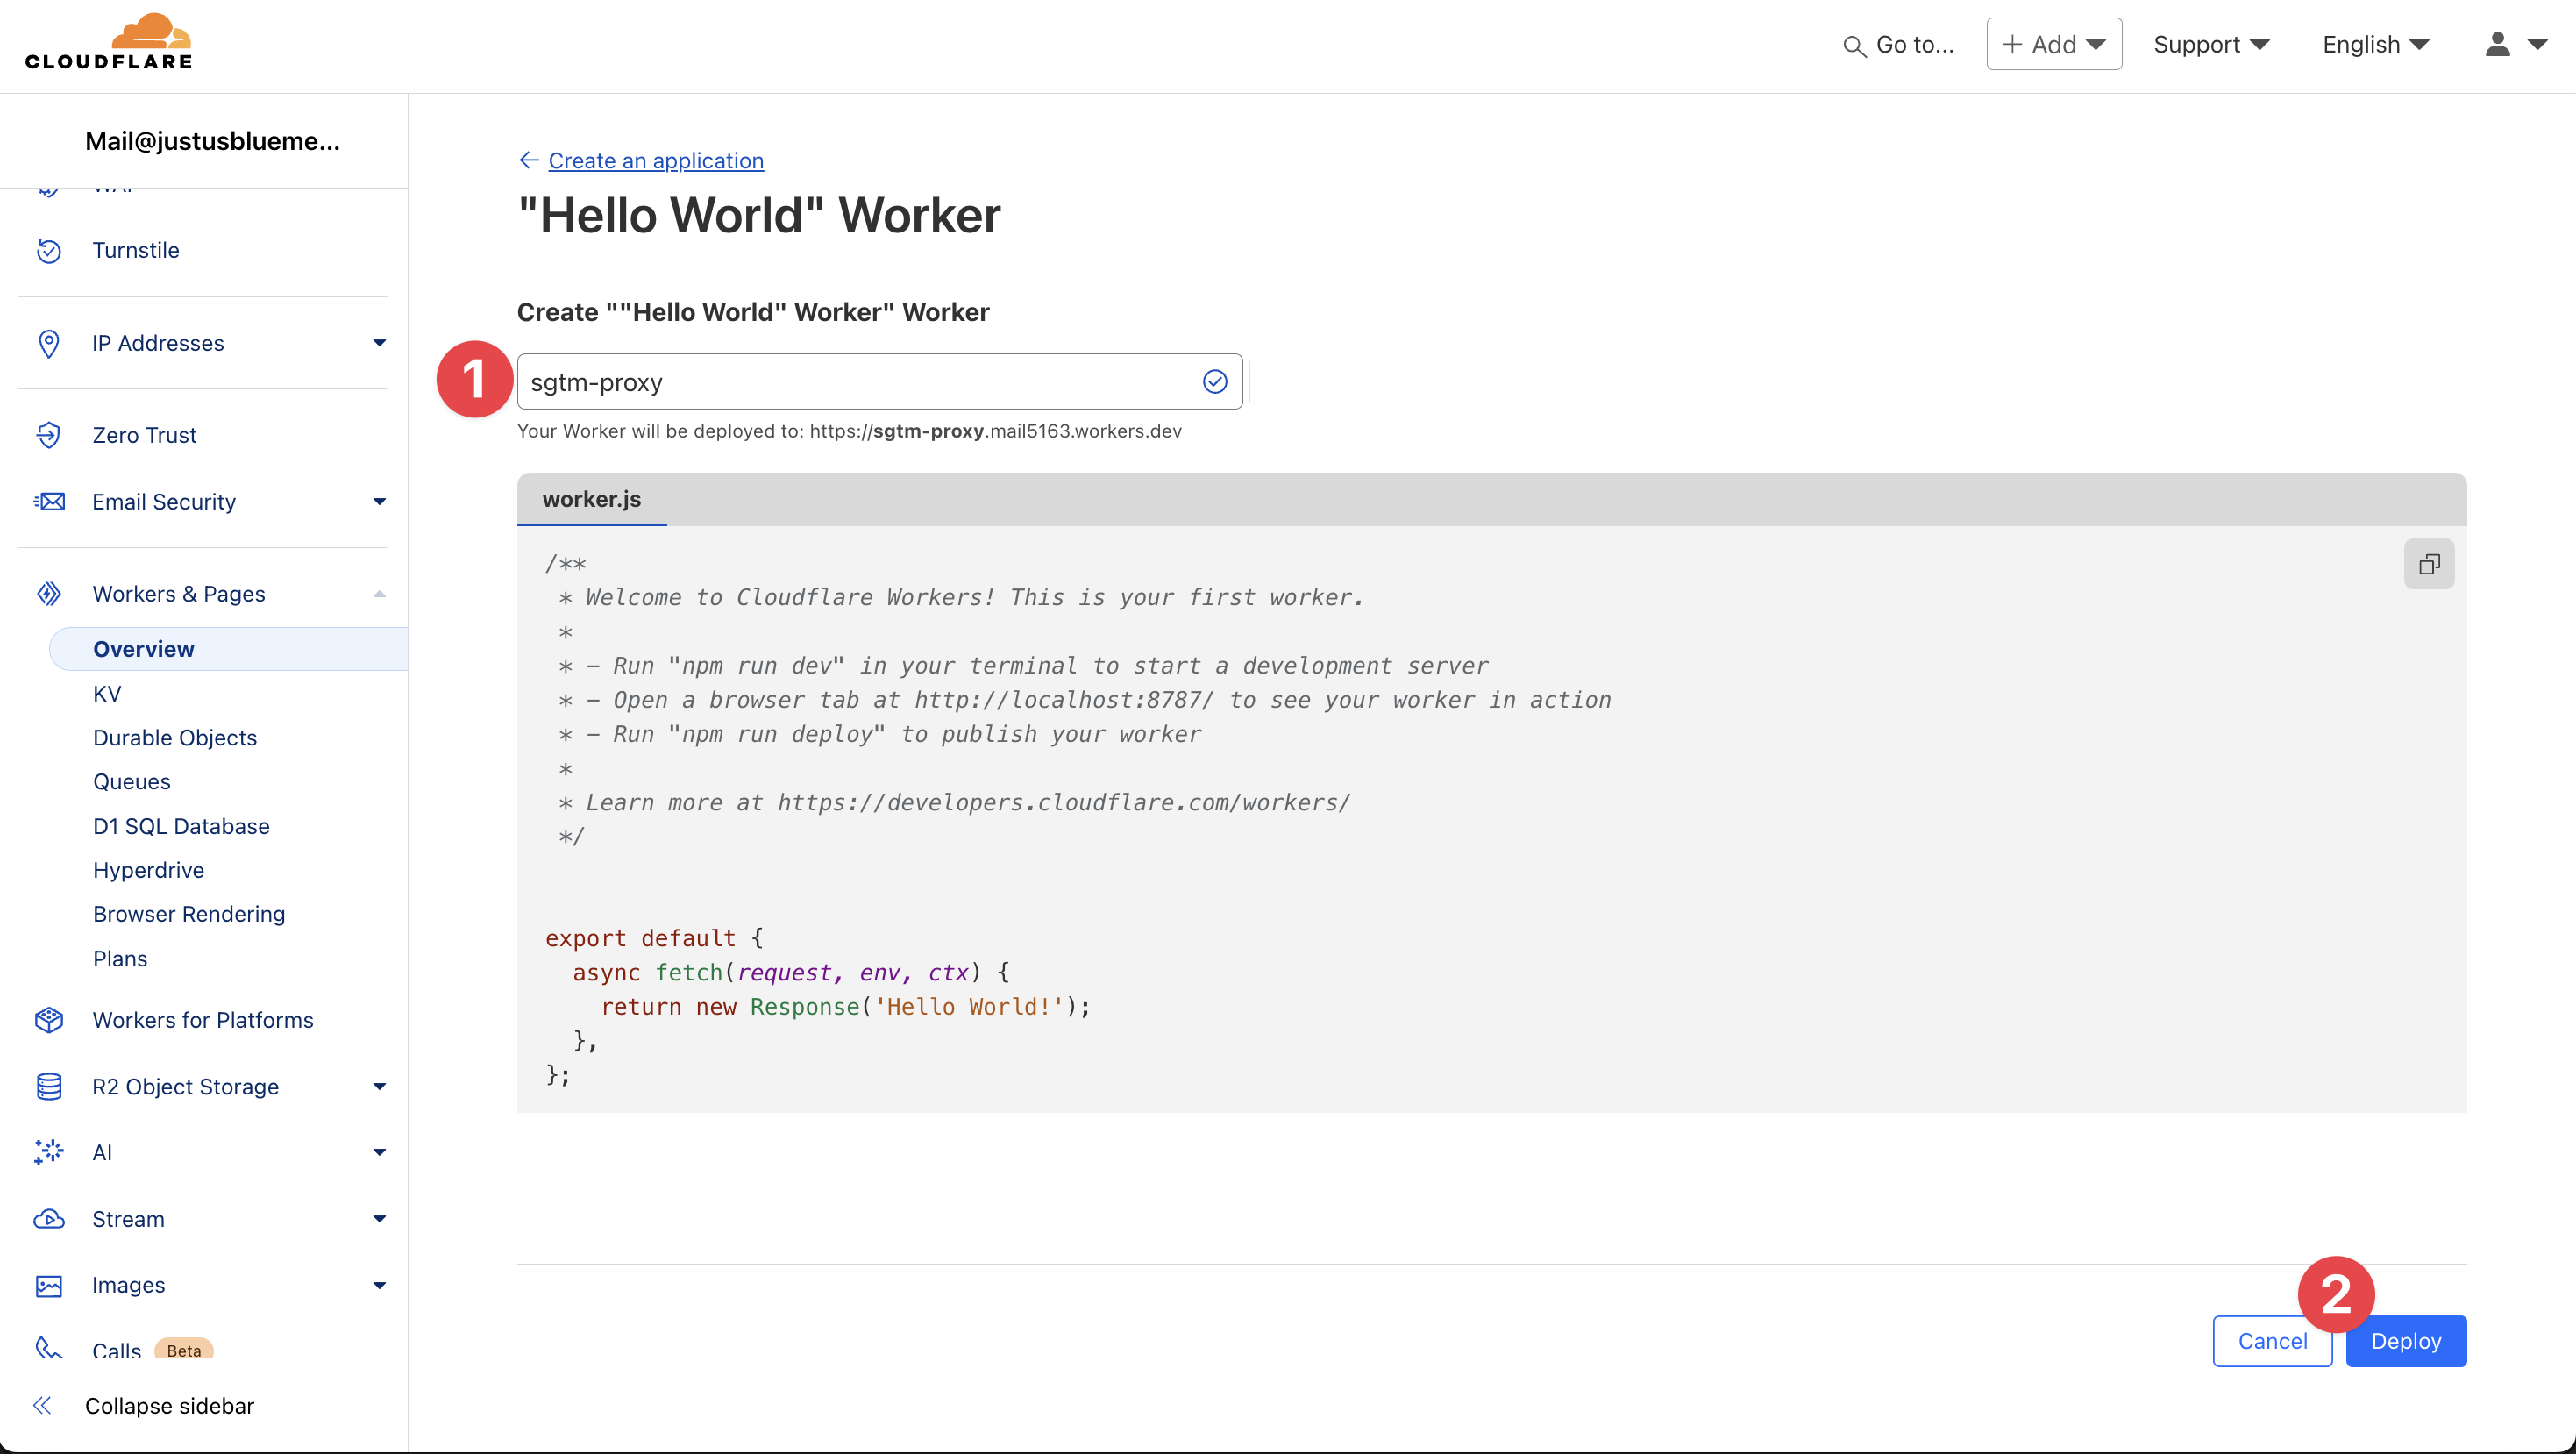
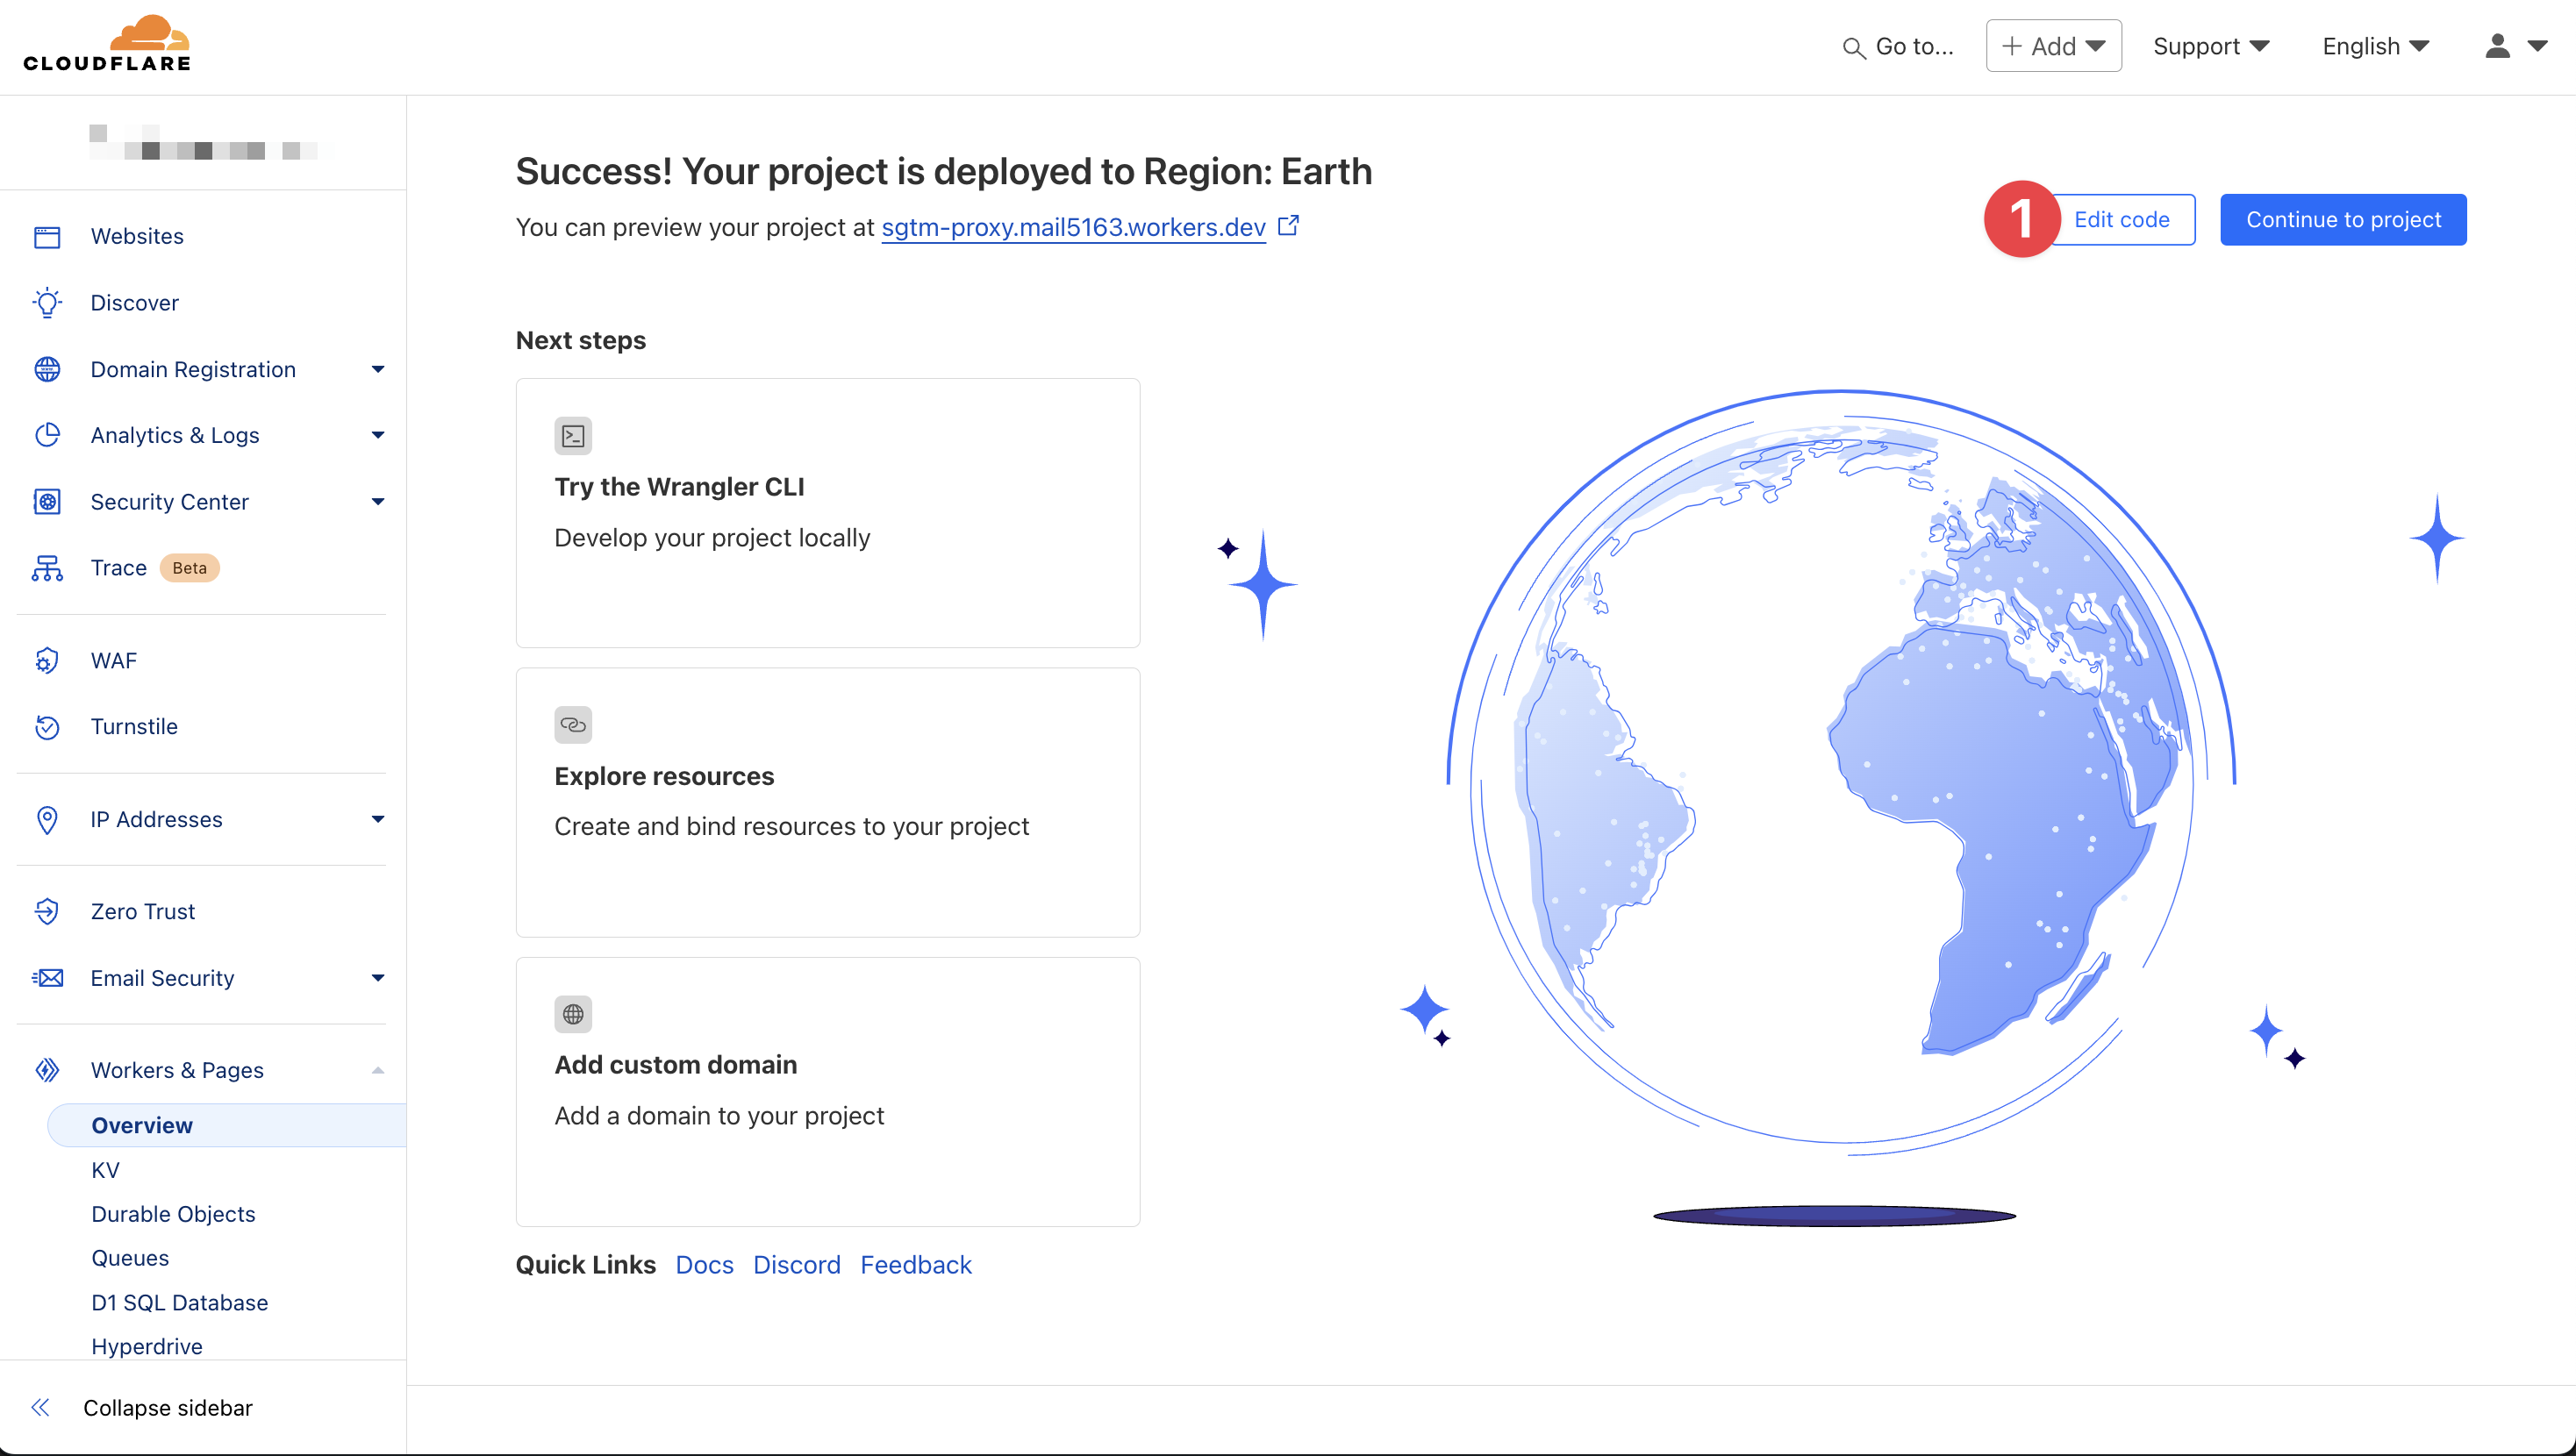
Click “Edit Code” to open the worker’s code editor.
Now, copy the code below and paste it into the editor, replacing the existing code entirely (1).
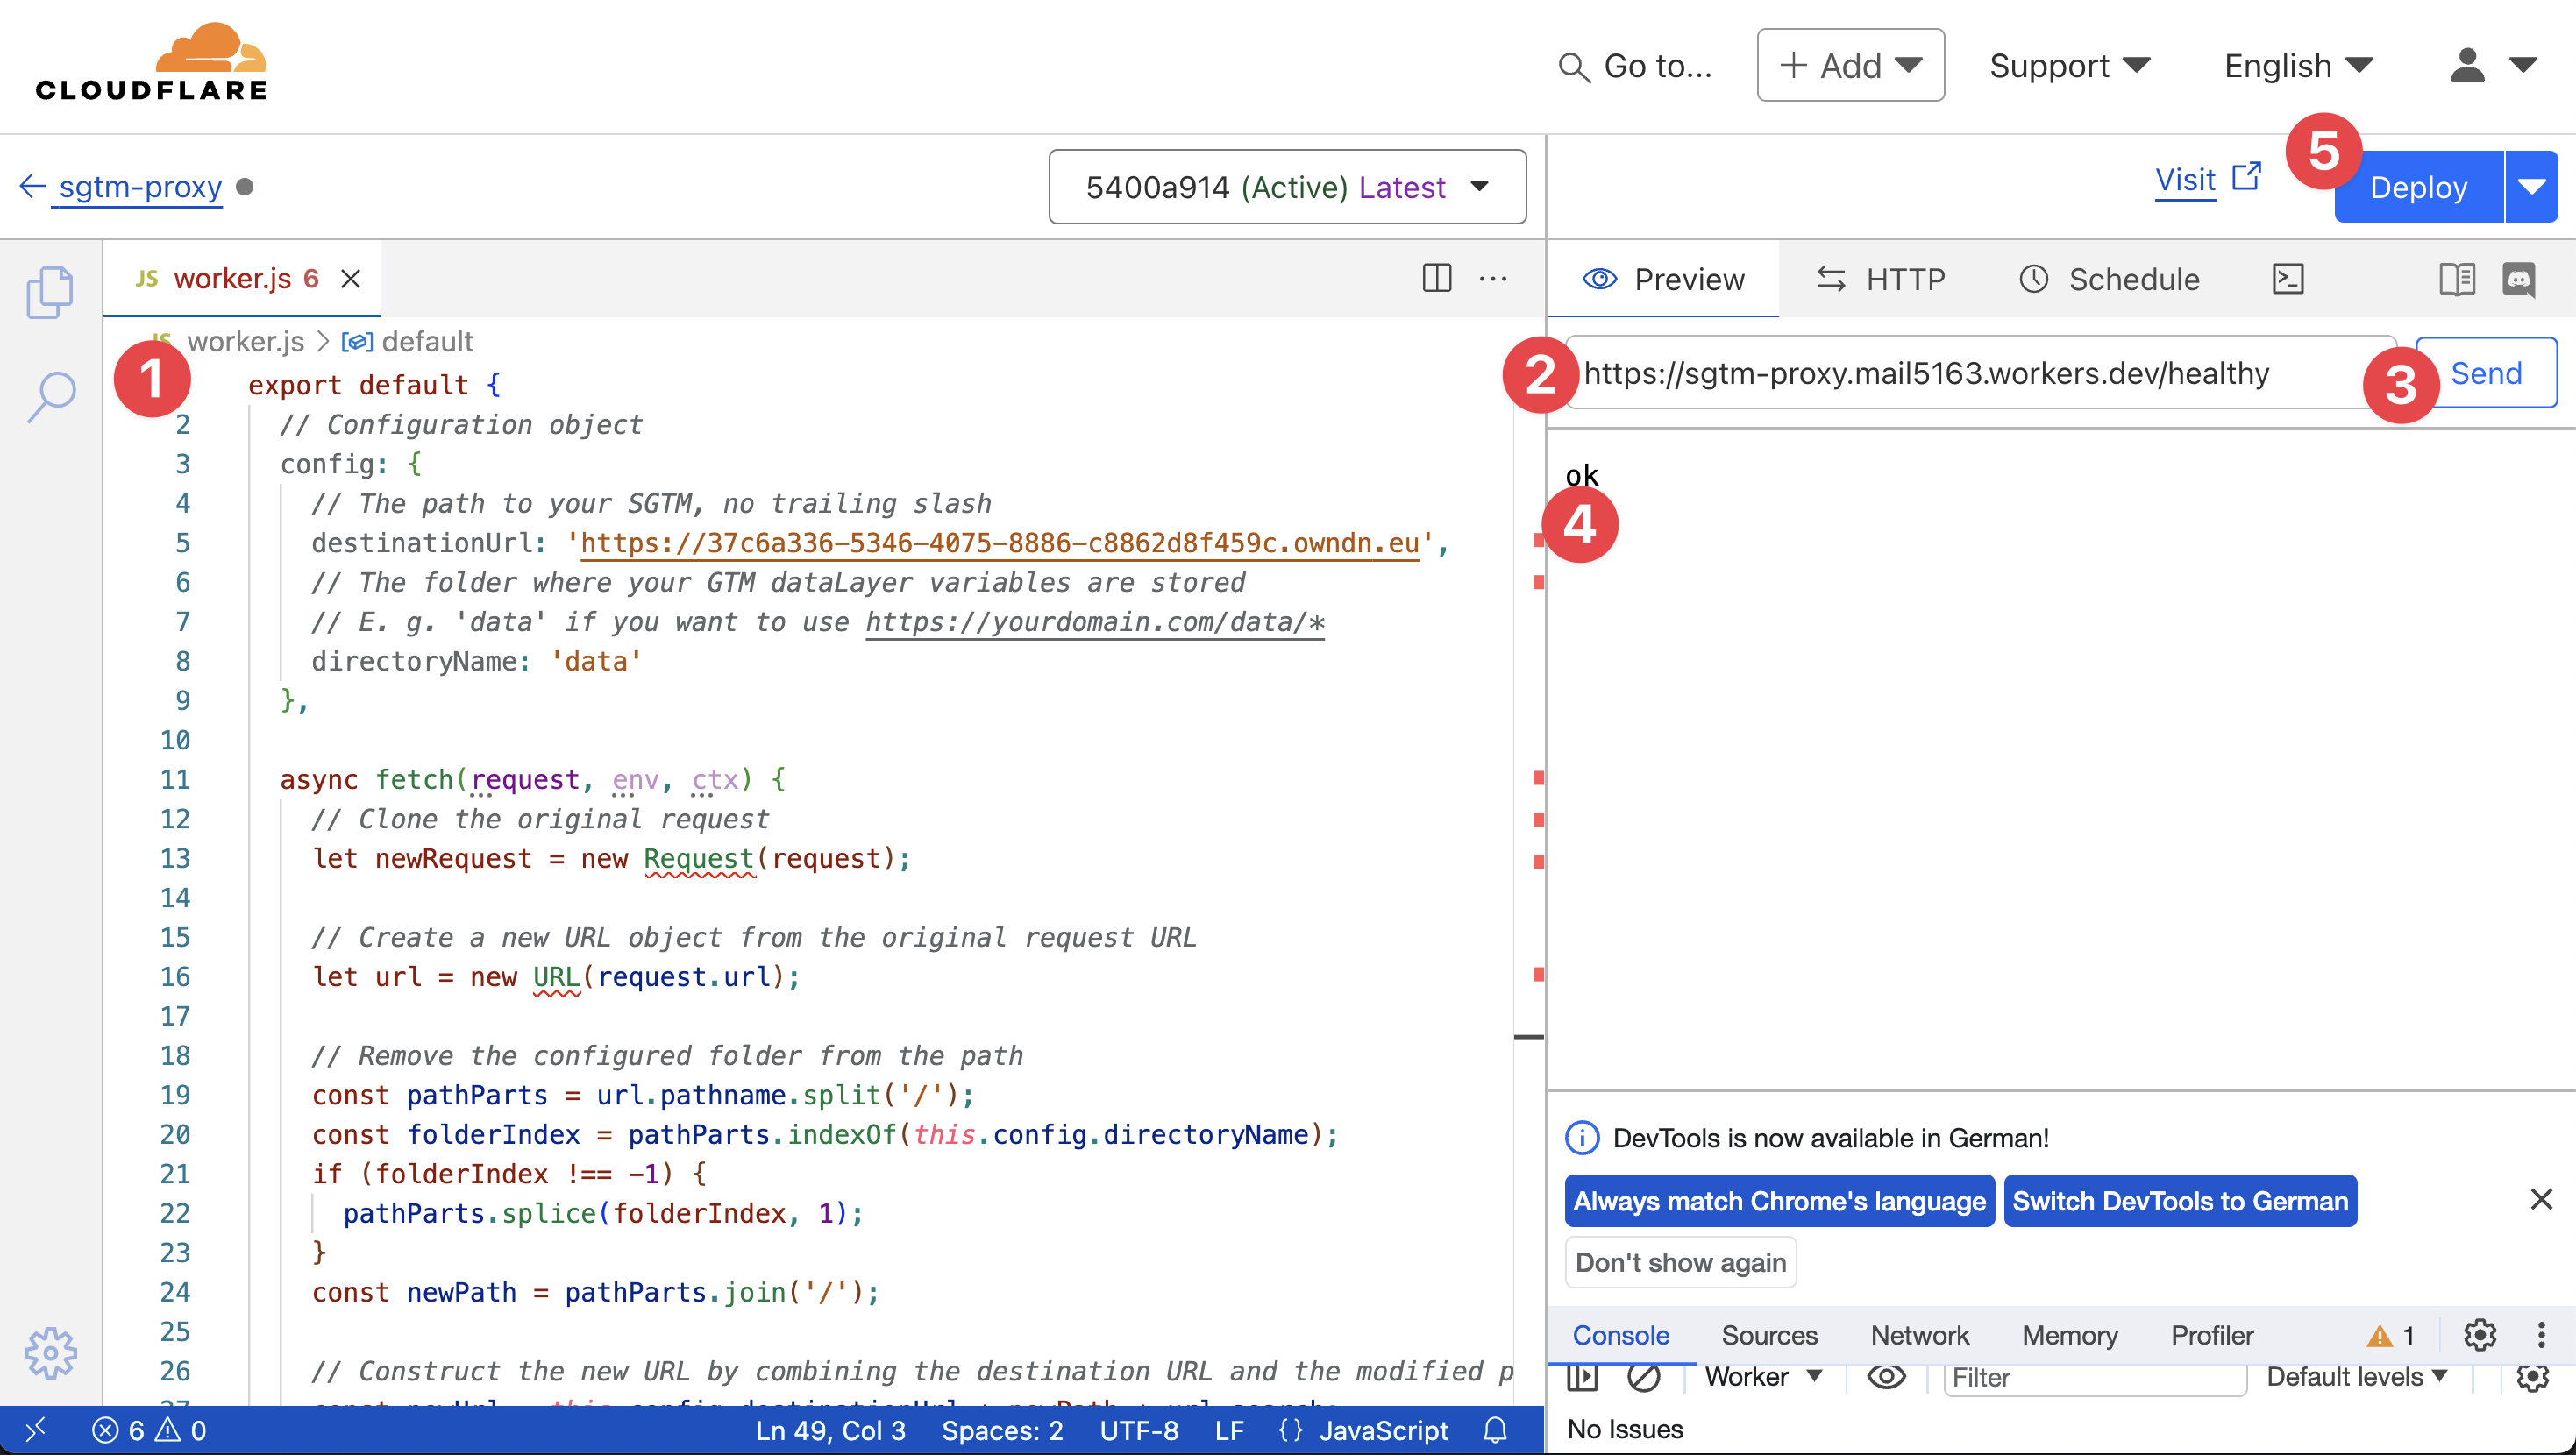
Review lines 5 (destinationUrl) and 8 (directoryName) and adjust the URLs to suit your setup.
export default {
  // Configuration object
  config: {
    // The path to your SGTM, no trailing slash
    destinationUrl: 'https://YOUR-SGTM-DEFAULT-HOSTNAME.owndn.eu',
    // The folder where your GTM dataLayer variables are stored
    // E. g. 'data' if you want to use https://yourdomain.com/data/*
    directoryName: 'data'
  },

  async fetch(request, env, ctx) {
    // Clone the original request
    let newRequest = new Request(request);

    // Create a new URL object from the original request URL
    let url = new URL(request.url);

    // Remove the configured folder from the path
    const pathParts = url.pathname.split('/');
    const folderIndex = pathParts.indexOf(this.config.directoryName);
    if (folderIndex !== -1) {
      pathParts.splice(folderIndex, 1);
    }
    const newPath = pathParts.join('/');

    // Construct the new URL by combining the destination URL and the modified path + query
    const newUrl = this.config.destinationUrl + newPath + url.search;

    // Create new headers object
    let newHeaders = new Headers(request.headers);

    // Modify the Host header
    newHeaders.set('Host', new URL(this.config.destinationUrl).host);

    // Create the new request to send to the destination
    newRequest = new Request(newUrl, {
      method: request.method,
      headers: newHeaders,
      body: request.body,
      redirect: 'manual'
    });

    // Fetch the response from the destination
    const response = await fetch(newRequest);

    // Return the response without modification
    return response;
  },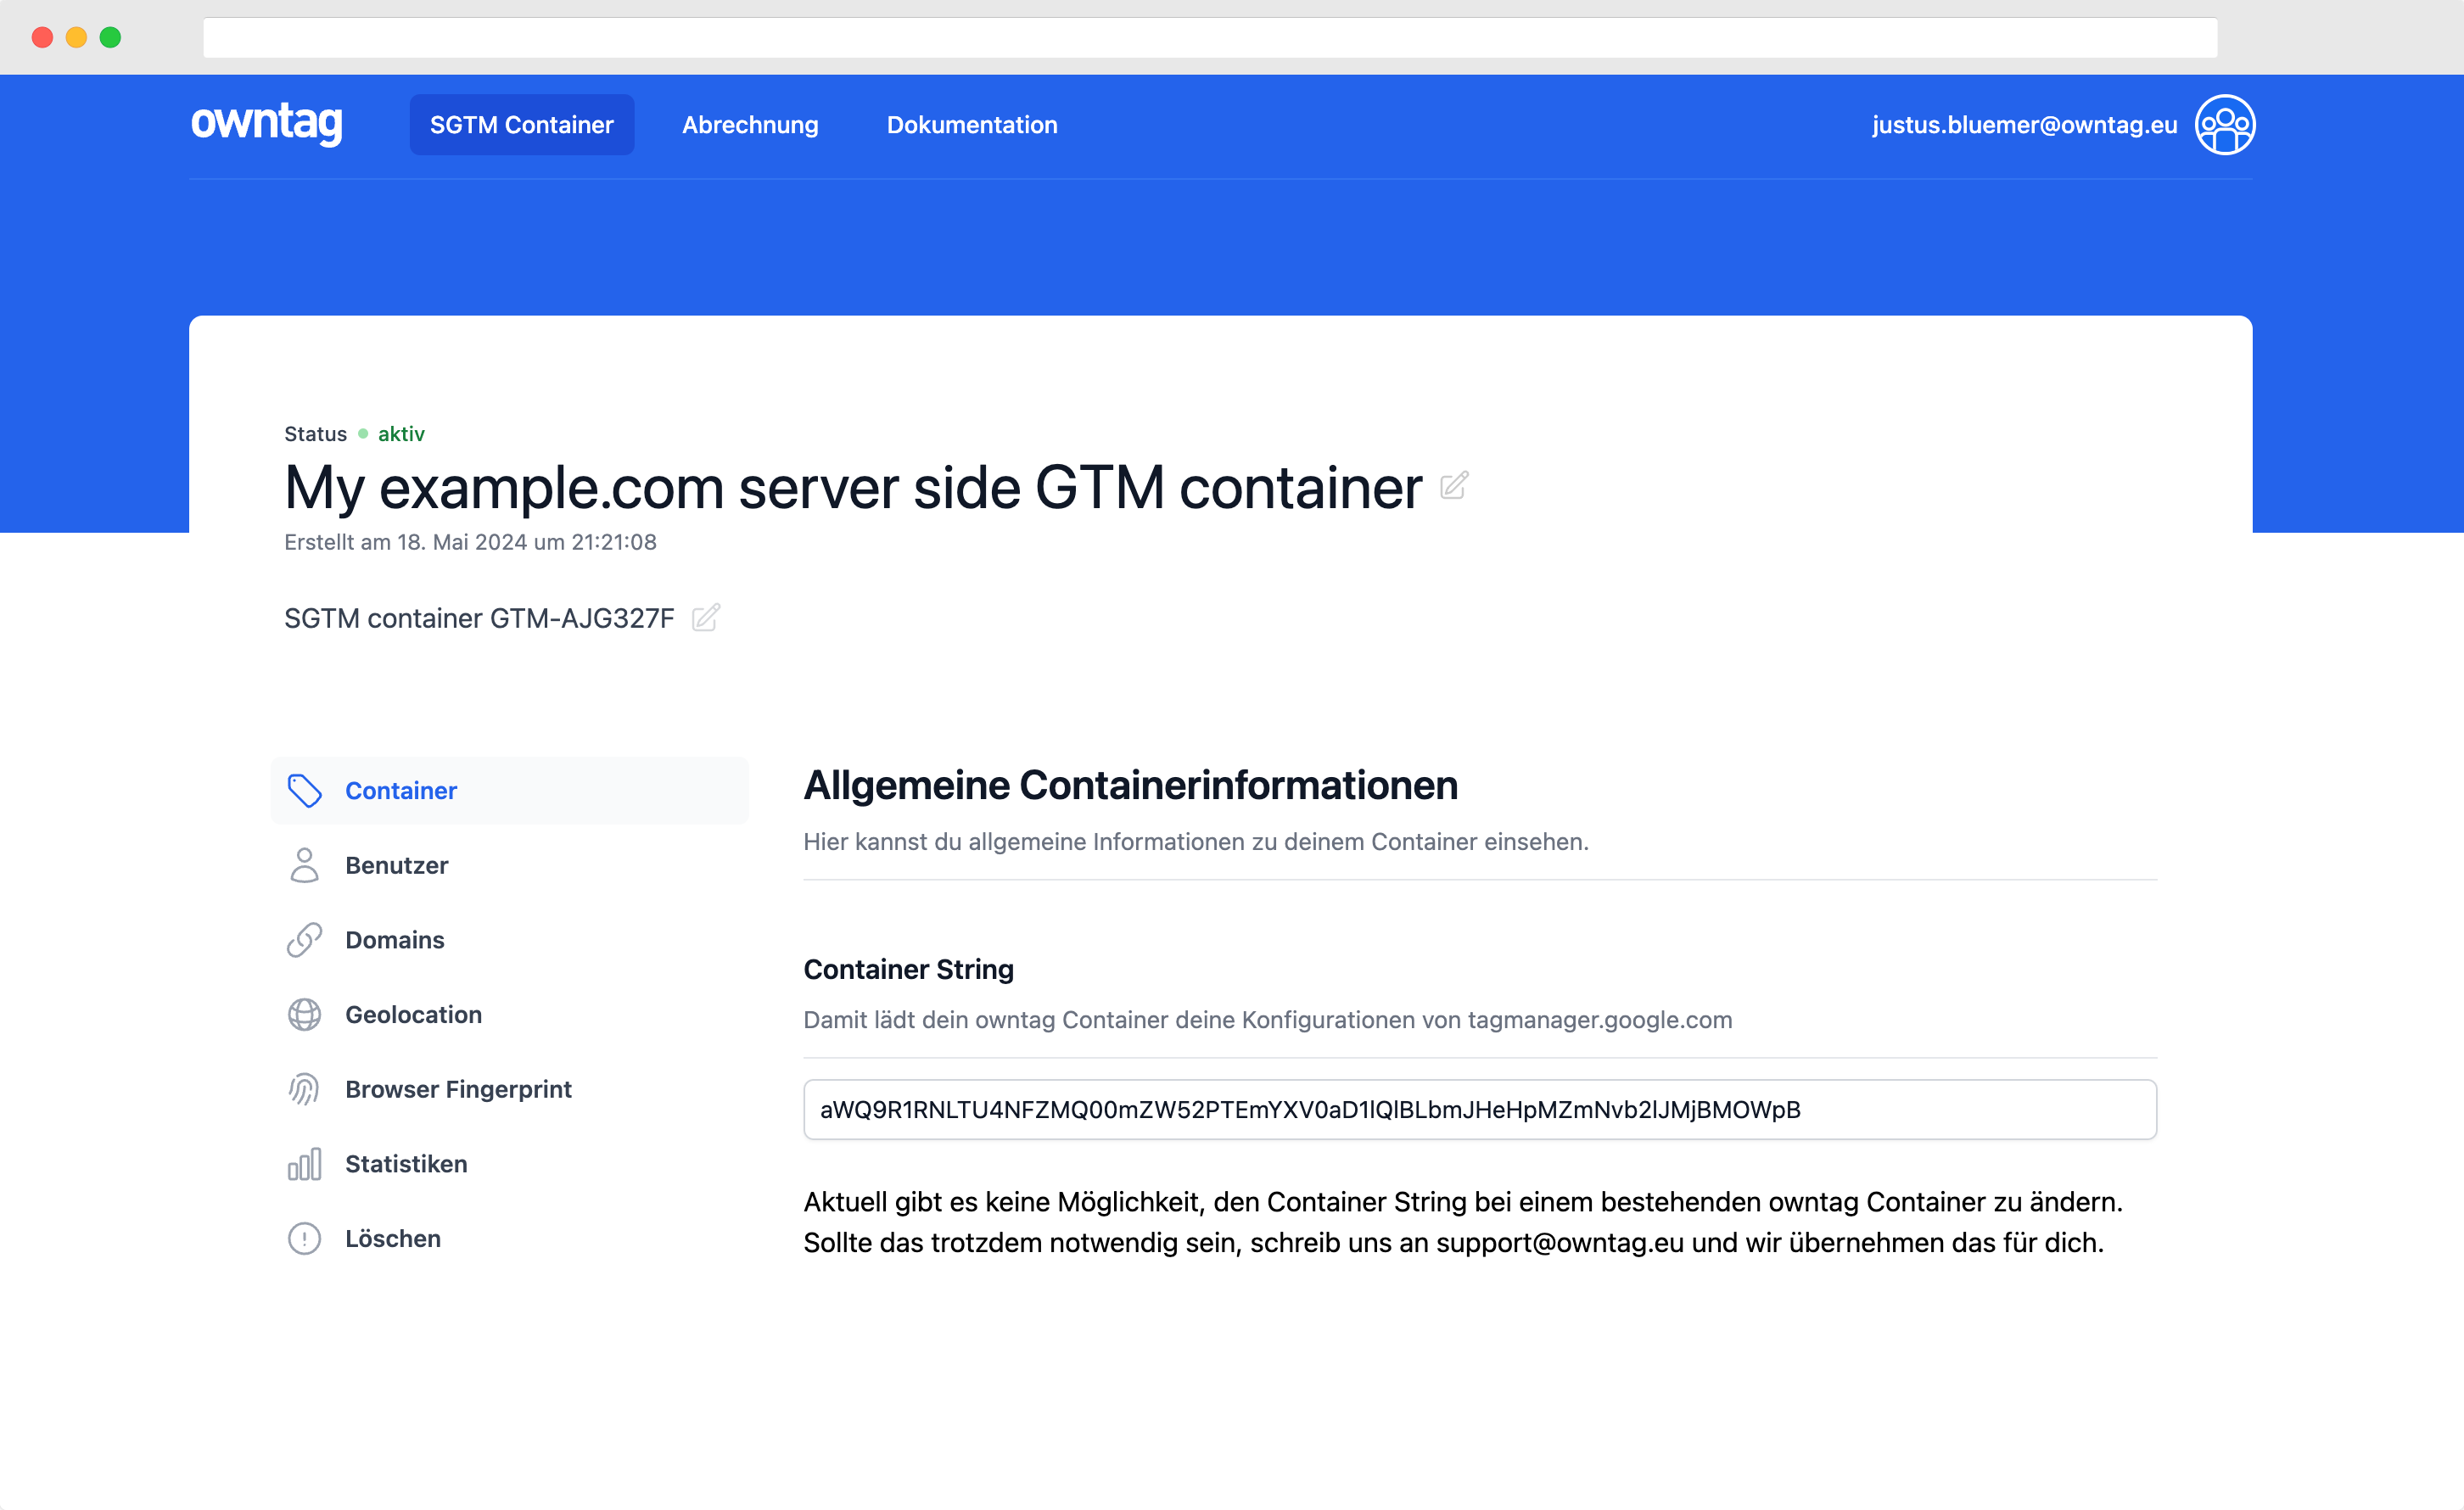
};As an owntag user, you should enter the default hostname of your container, which ends in .owndn.eu.
The value of directoryName is the path under which your server-side GTM will be accessible. For example, if you want to send data to https://yourwebsite.com/data/, the value here is data.
To test your setup, append /healthy (2) to the URL shown in the editor and click “Send” (3). If everything is configured correctly, ok (4) should appear in the window below.
The path you choose must not be used for any other purpose. If unsure, ask your colleagues whether the path can be used without issues. /data/ is just an example; more specific alternatives like /metrics/ or /insights/ are also possible.
If that works, you can deploy the worker live with a single click on “Deploy” (5).
Next, ensure the worker is executed when the special URL path is called.
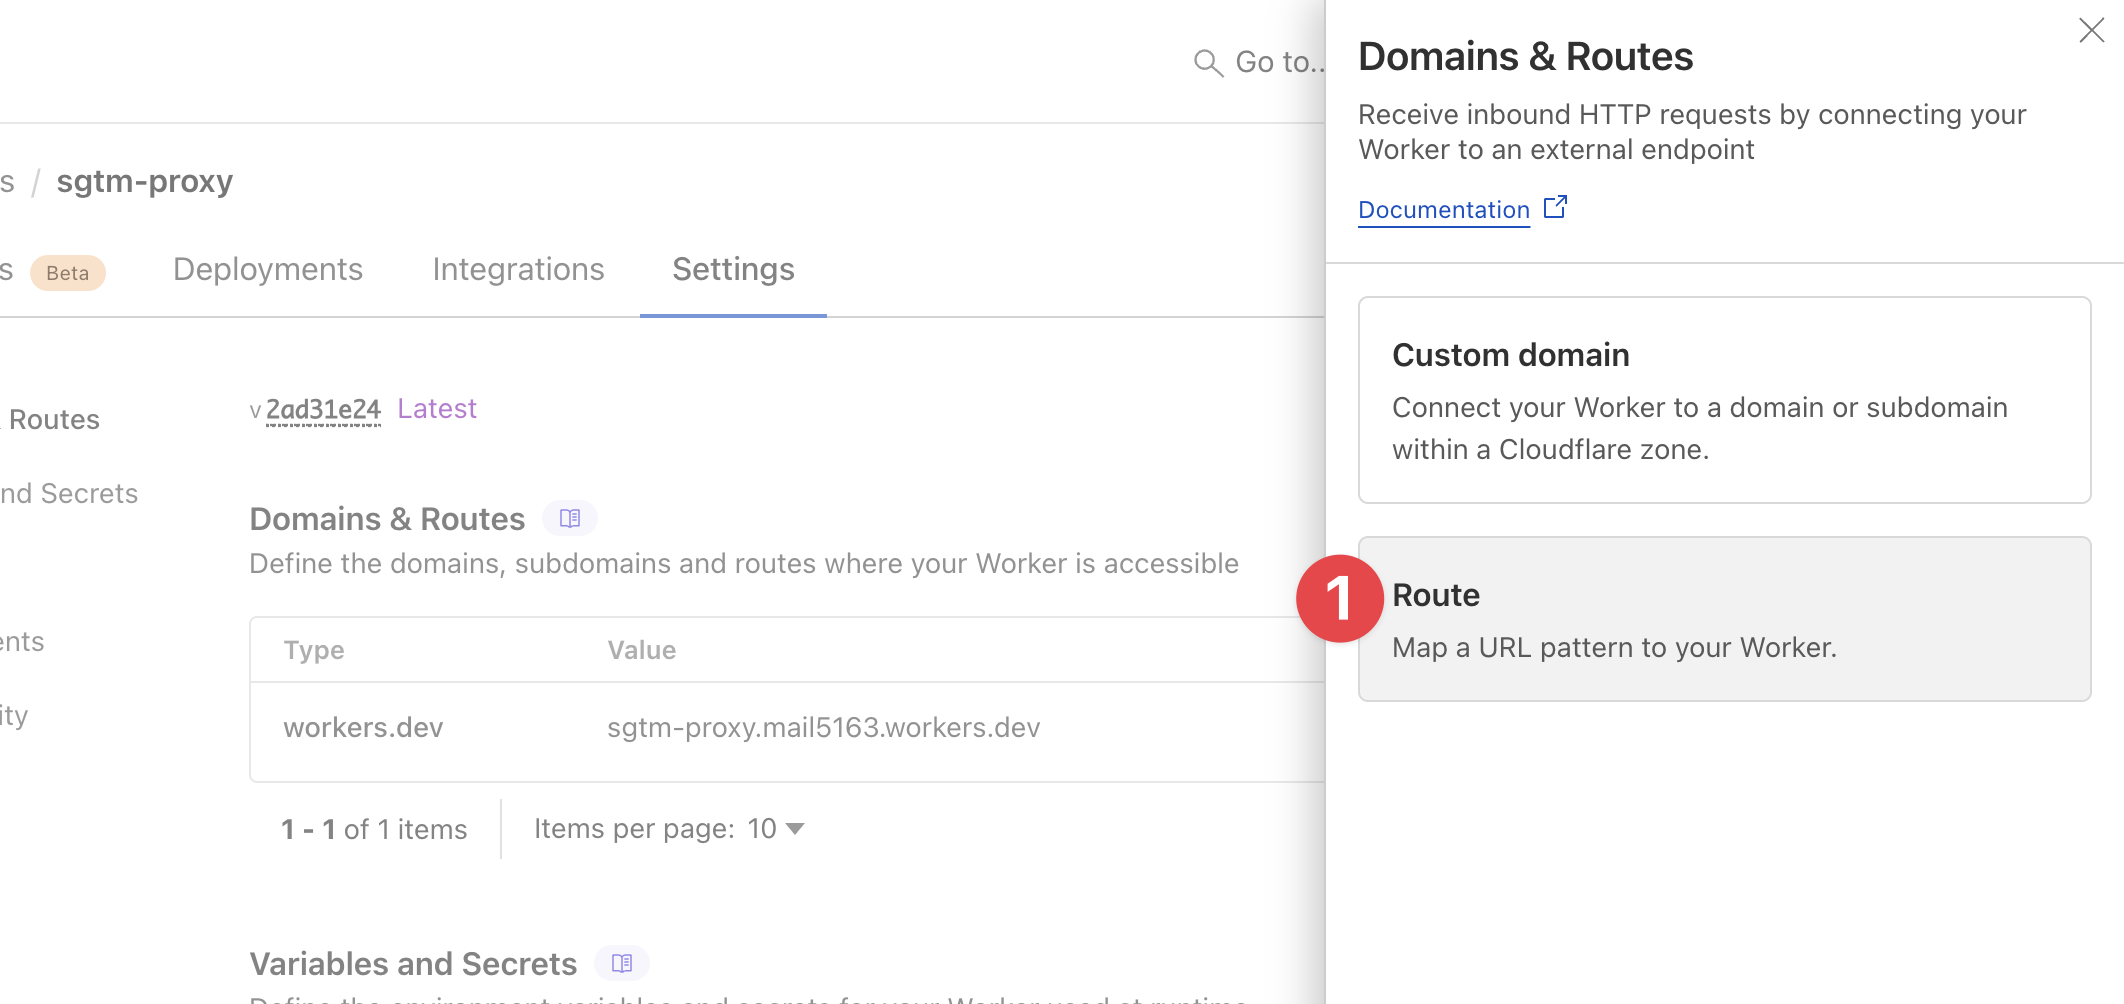
In the “Zone” field, select the domain for which you created the worker.
In the “Route” field below, enter the URL path where the worker should execute.
The appropriate pattern for this is:
*.yourwebsite.com /data/*Again, adjust data to match the value you defined in directoryName in the worker code.
That’s it!
Now you can test your new setup by calling the URL of your worker with /healthy appended:
https://yourwebsite.com/data/healthyThe worker will forward the request to the server-side GTM, meaning in our example, the URL https://37c6a336-5346-4075-8886-c8862d8f459c.owndn.eu/healthy will be called.
The /healthy endpoint is a standard feature of the server-side GTM and returns “ok” if everything is working as expected.
Adjust GTM Container Snippet
You can now adjust your GTM container snippet so that data is transmitted to your tracking system as usual.
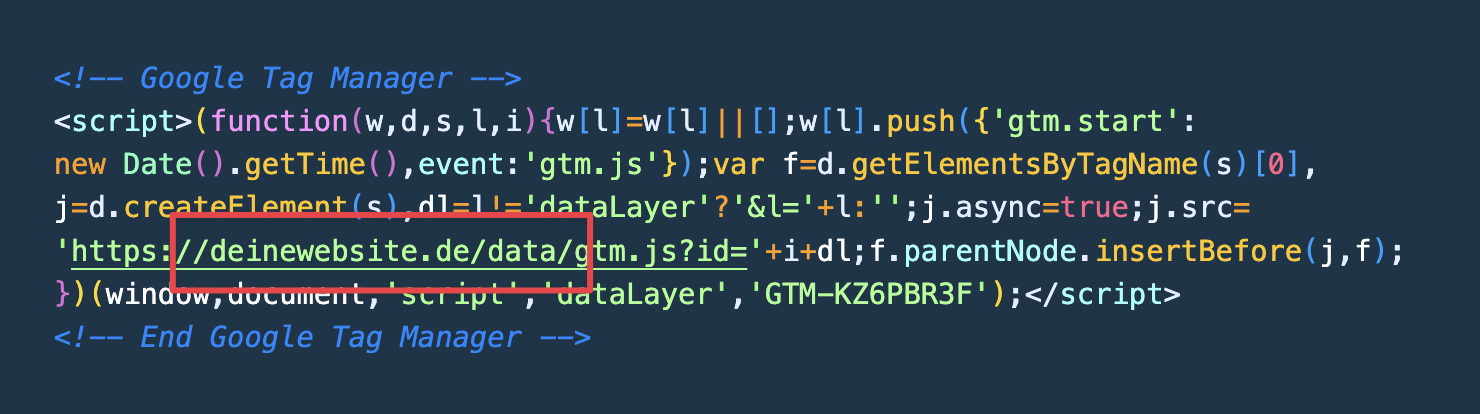
If you haven’t done so yet, set up a client in your server-side GTM container that delivers the gtm.js file for your web container:
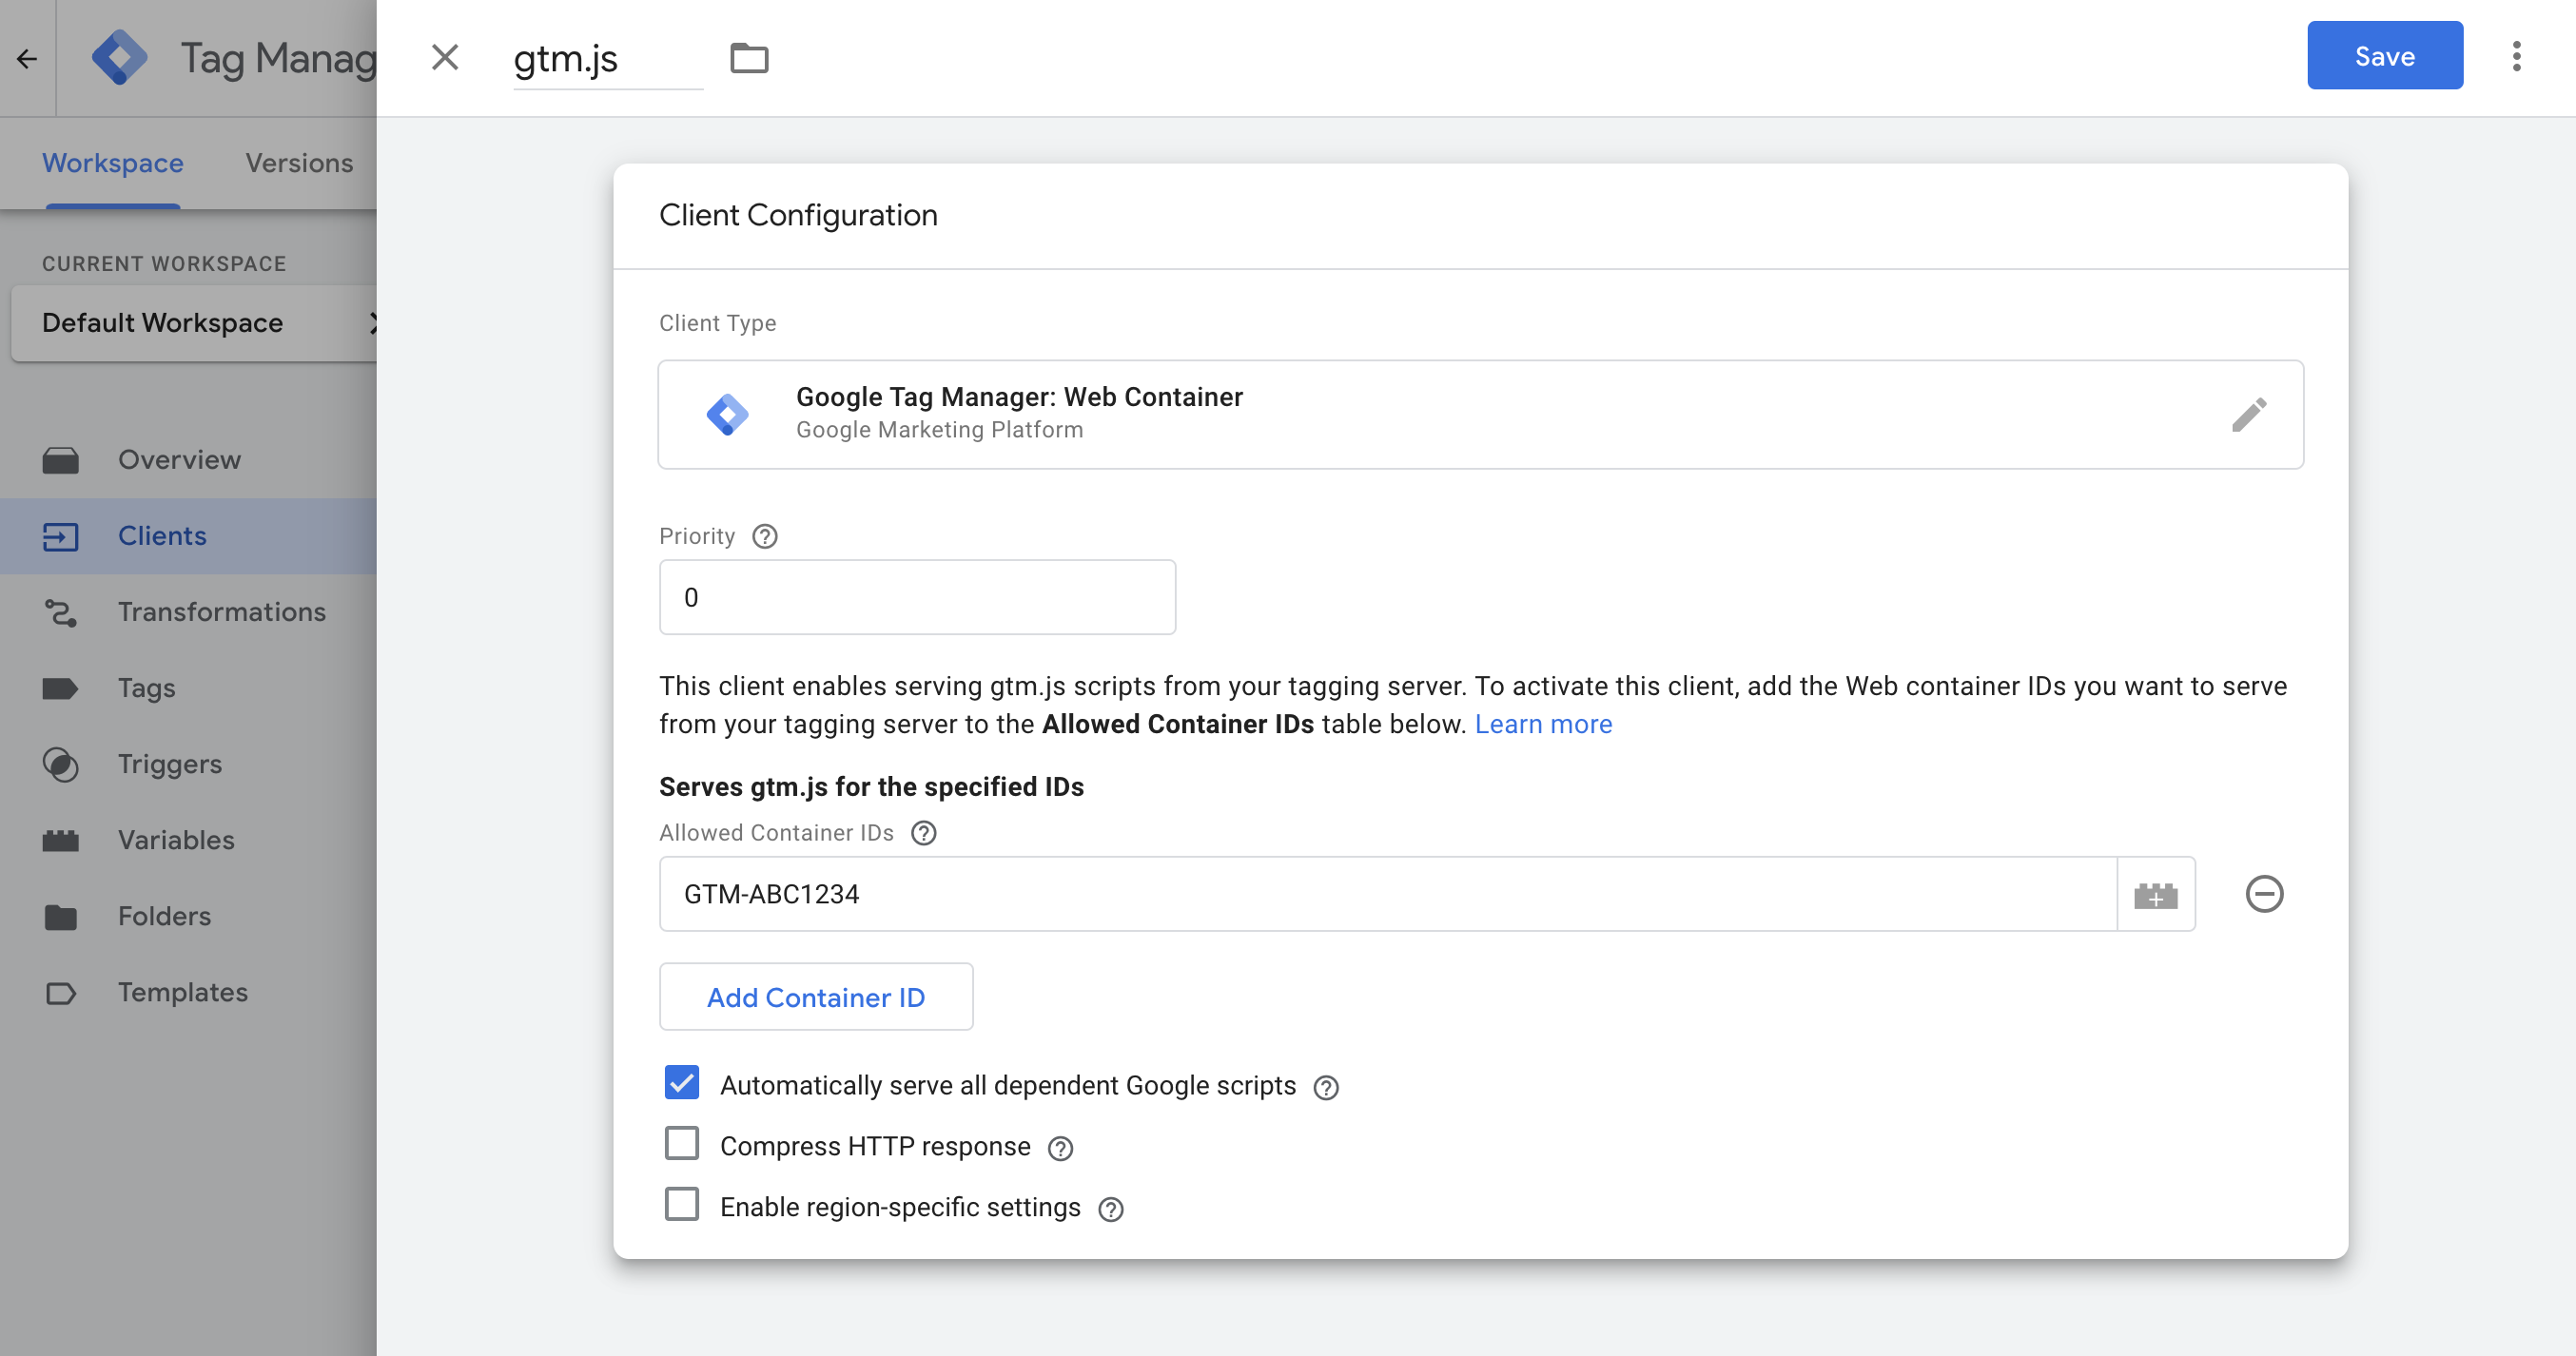
If you also change the filename `gtm.js`, you can bypass simple ad blockers that block loading the GTM web container based on this filename. Use the GTM Loader Template by Simo Ahava.
Make sure to update the filename in your GTM container snippet accordingly.
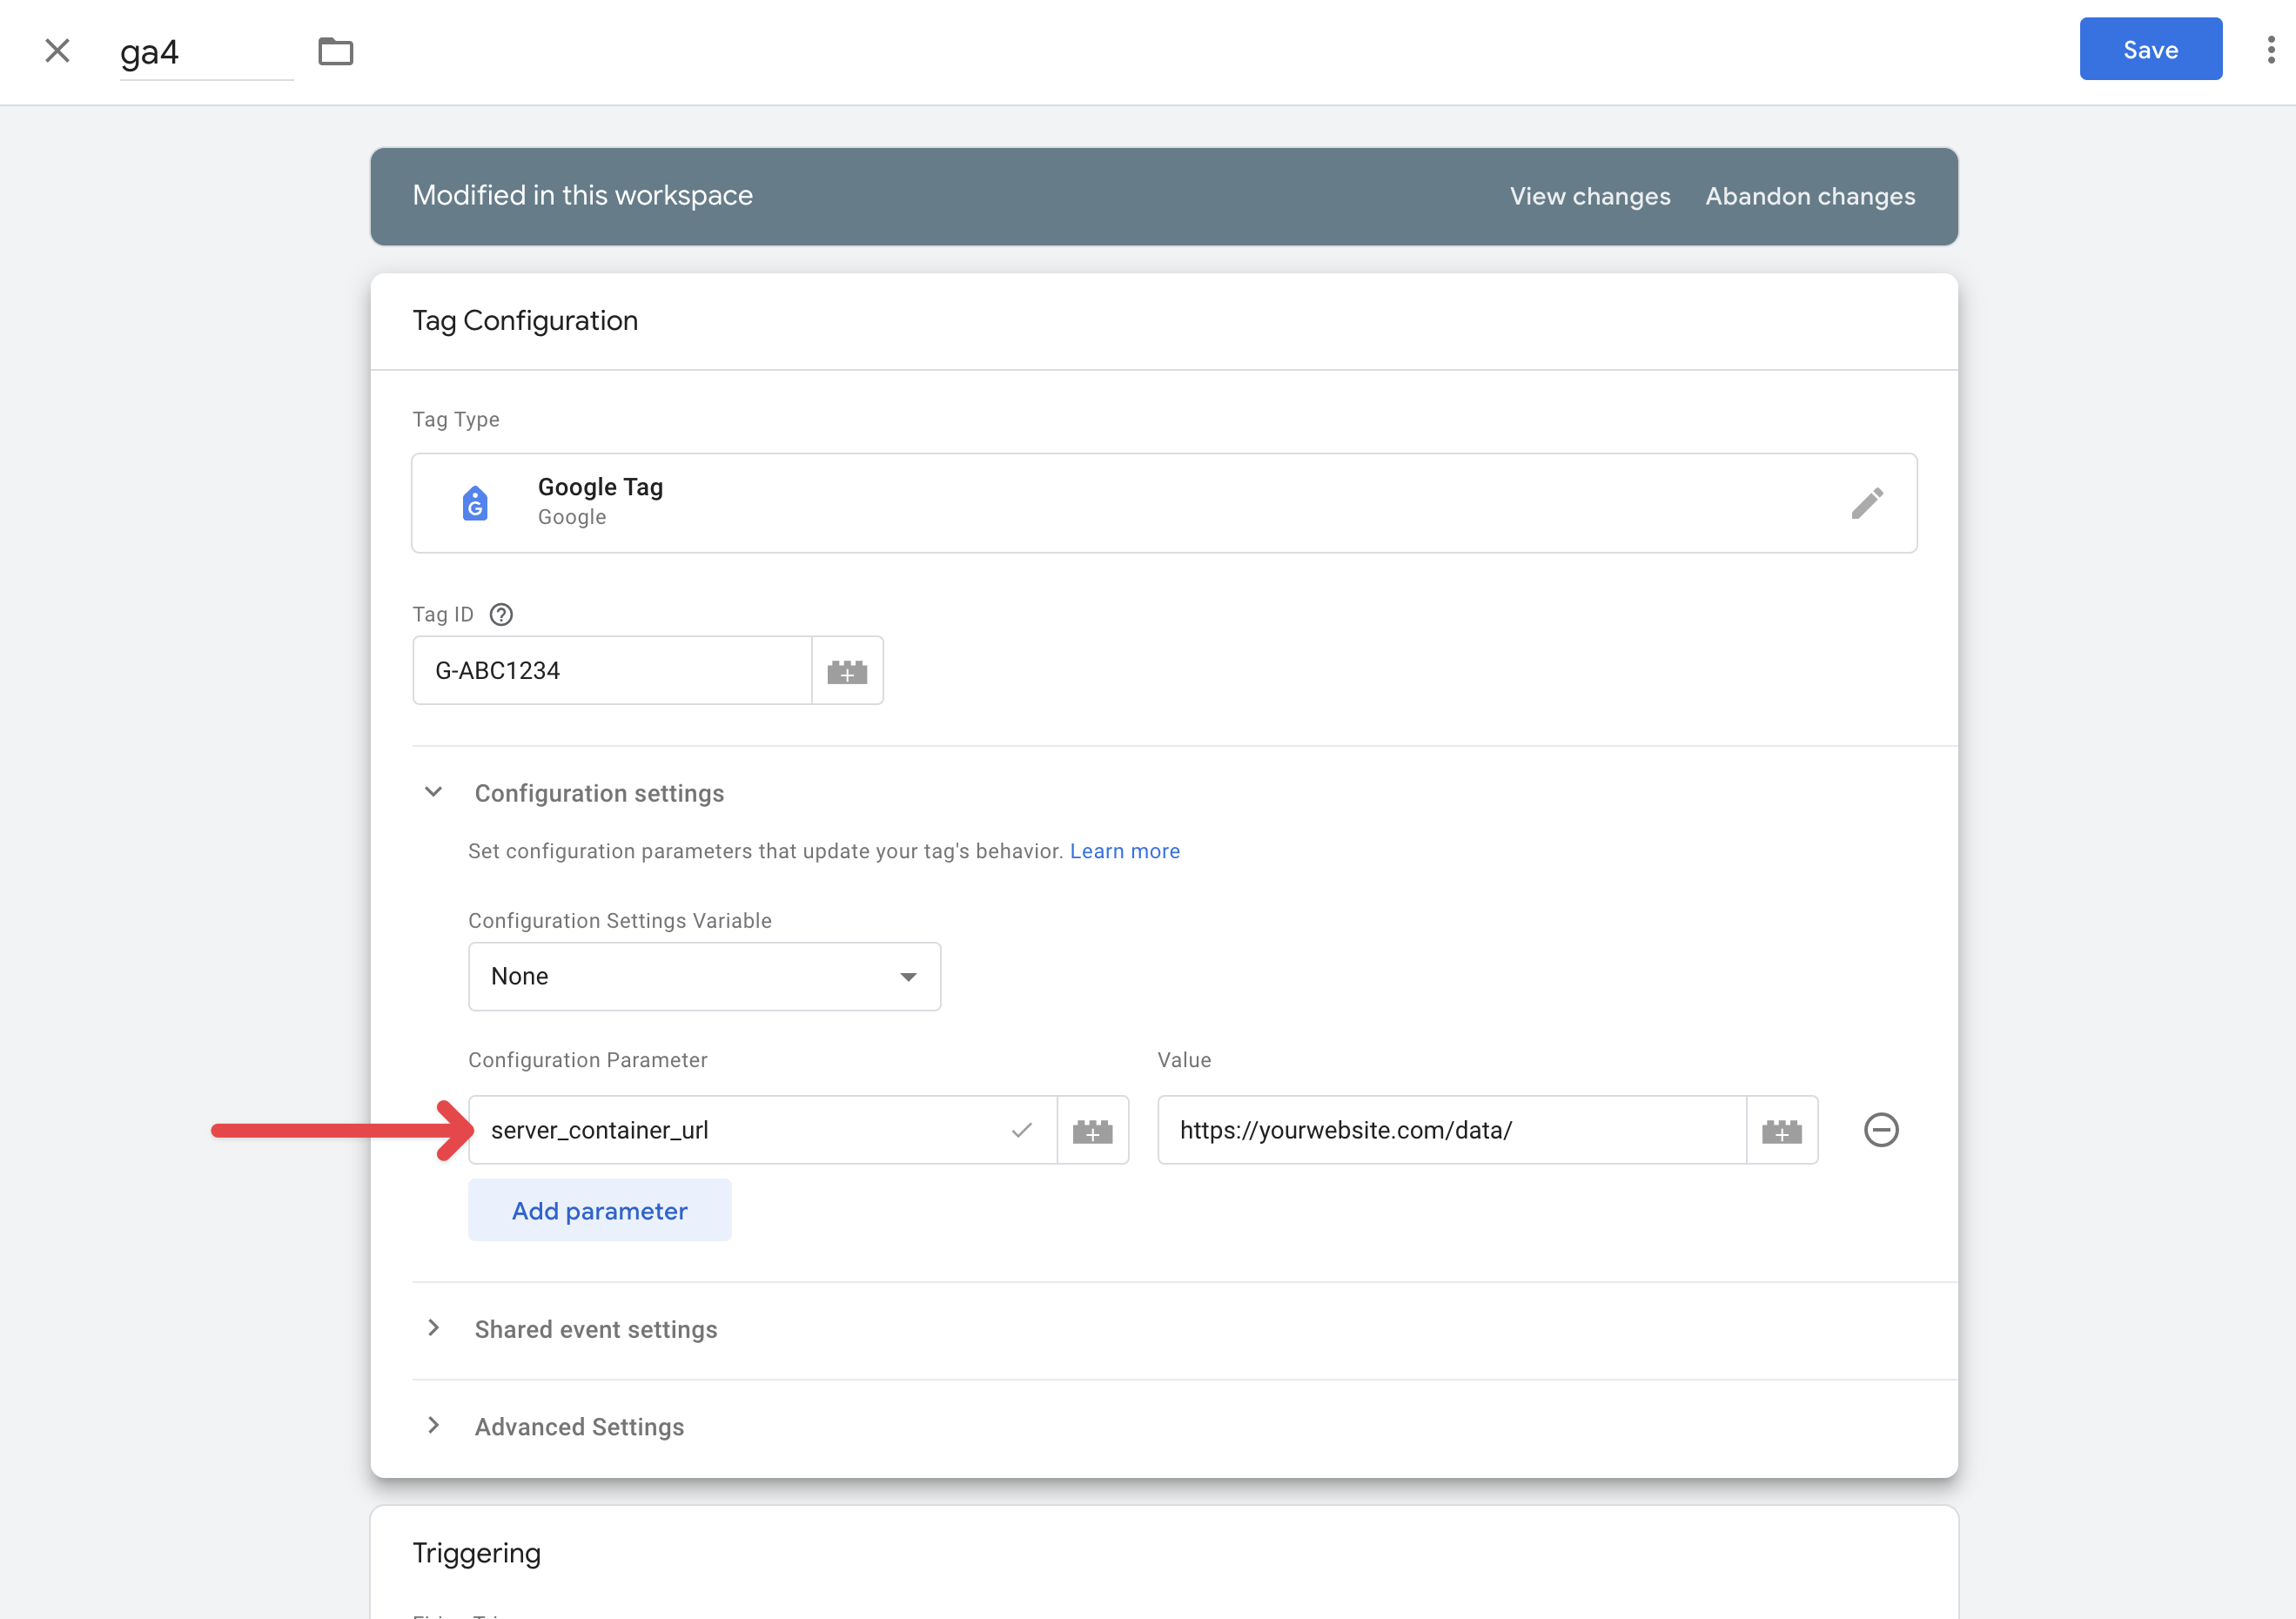
Set server_container_url
Finally, you must set the server_container_url parameter on the GA4 tag in your GTM web container to point to your worker’s URL. This ensures your GA4 tags send data to your Cloudflare worker instead of directly to google-analytics.com:
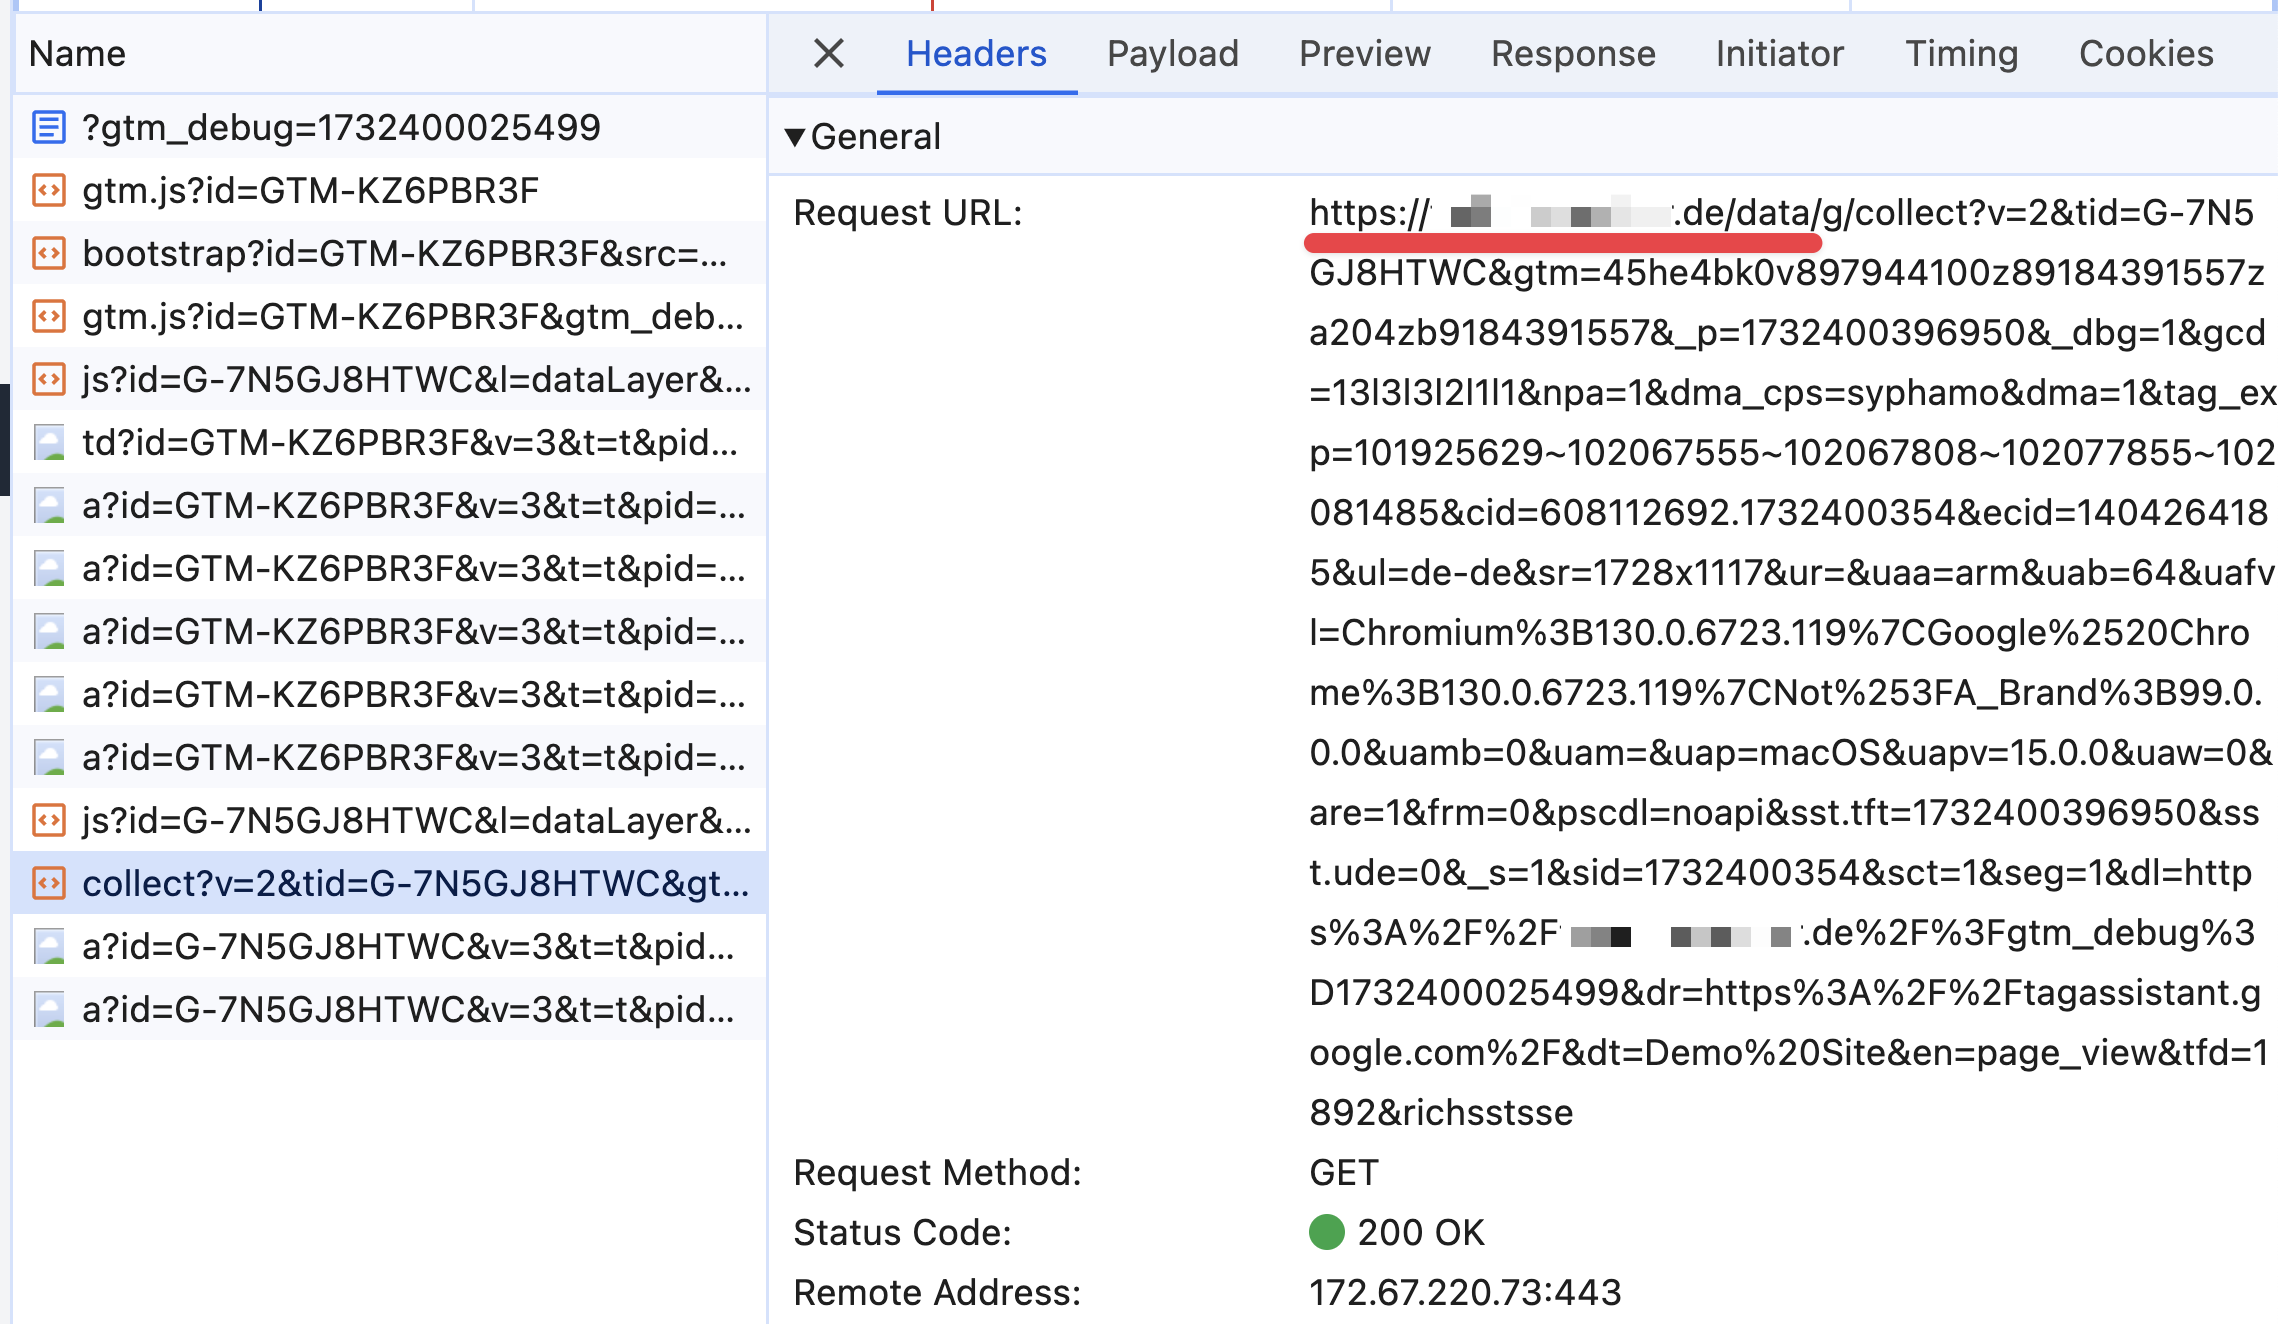
When you preview these changes, you should see that outgoing requests containing GA4’s characteristic collect URL send data to your website’s main domain:
Congratulations!
You’ve now set up a first-party and same-origin configuration that—at least for now—bypasses ITP.
Ready to go server-side?
Take control of your digital data collection with Server Side Tagging – easily and conveniently hosted with owntag.